Date and Apple Crumble Cake

Hello hello.

I have been feeling as though a chocolate/nutella/peanut butter/brownie/cookie cleanse is in order.

I know, don't shun me! You will forgive me once you have tried out this cake.


Ok so there was me 7pm on a Friday night up to my ears in the most foul smelling, off milk you could ever imagine (yay for honours!) when my good friend Jelley came to visit me in the lab. We decided that since we were both being incredibly antisocial and lame for a Friday night in the prime of our lives that we should probably compensate with ice cream and baking of some sort.

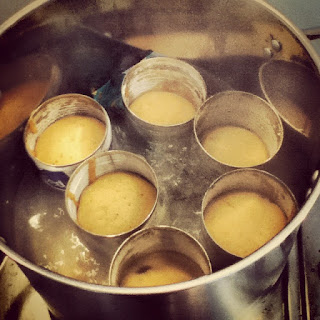
So after stocking up on treats at the shop in the link (we needed snacks to buy snacks) we stopped off at Kmart first to see what new wares I could purchase for $2. After leaving with a new blue spatula, some egg rings (for making crumpets in) and another packet (or two) of M&Ms (hey we needed more snacks for the trip to New World) we set off towards my happy place (aka the supermarket).

There we purchased all the necessary ingredients for an ice cream binge and an almond and apple cake.


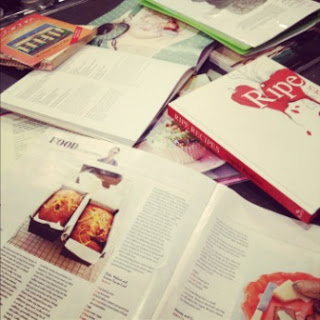
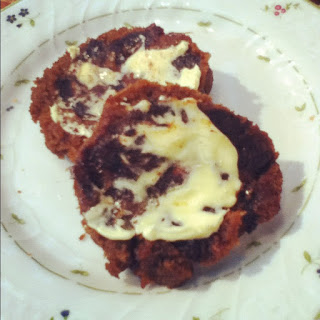
I had spied a recipe of Donal Skehan's recipes a month or so ago for a yummy looking cake. However I regret to inform you that it did not work out so well. I feel as though my eggs were a tad on the old side so a lovely smooth batter did not form. It was still delicious. Especially for breakfast the next day when heated in the microwave.

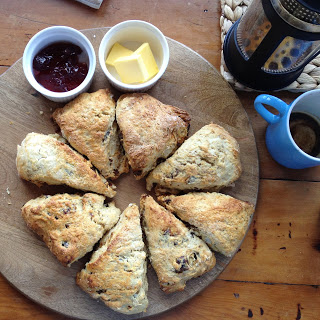
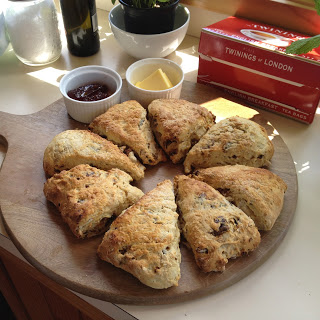
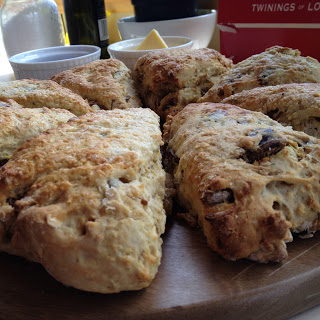
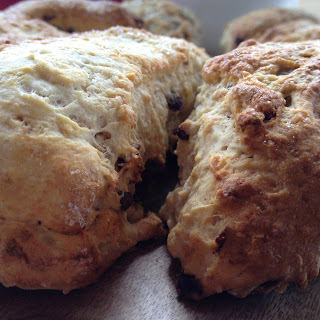
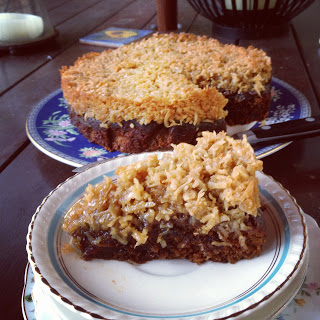
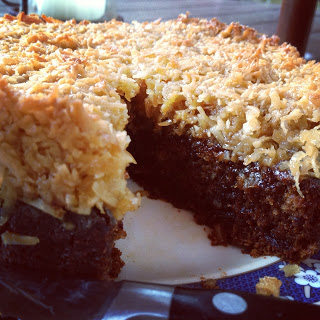
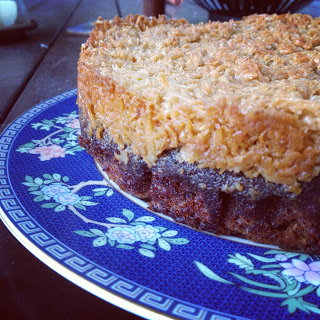
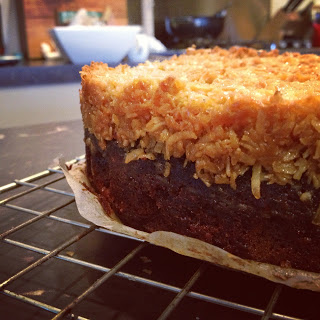
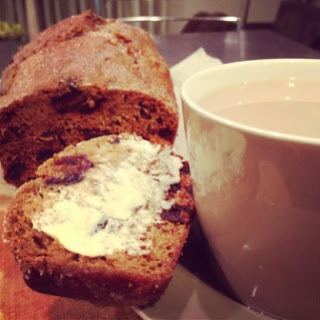
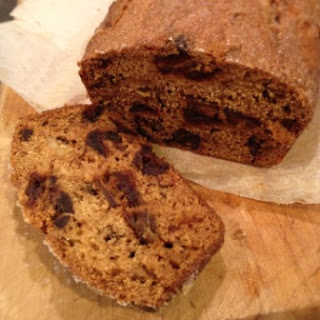
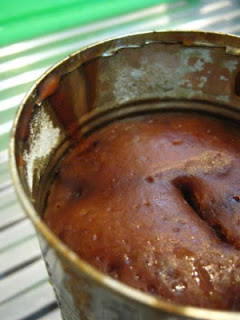
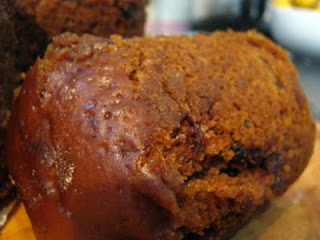
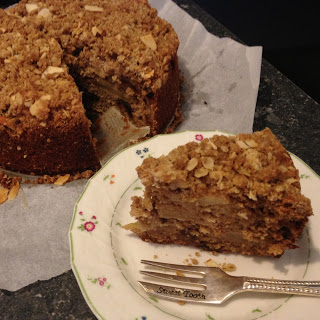
I had not given up on the mighty apple cake though! I had seen a delicious looking cake in Julie Le Clerc's Favourite Cakes book. It had a crumble topping and looked delicious and moist.


Buuut I made some adjustments.

A lot of adjustments now that I think about it.

I added apple slices rather than grated apple.
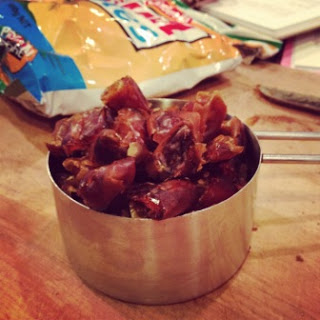
I added chopped dates rather than sultanas.
I used my Mum's crumble topping rather than the one suggested.
I added like a tonne more spices.
Used a totally different method
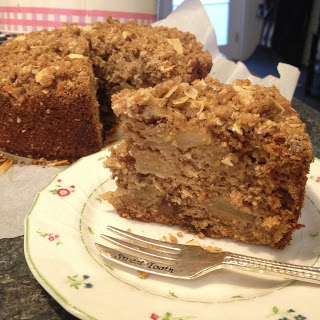
Aaand I made it into a rather tall 20cm round tin rather than the large, flat rectangular number as suggested.

So basically it is a totally different cake. Sort of.

I would definitely say use a larger spring form cake tin if you have one. This cake took a good hour and a bit to bake (I kinda lost track of time). This cake was rather tall and so the centre took quite a while to bake at I feel the detriment of the outer portion of cake. If you do end up over cooking your cake, pop a piece in the microwave and pour over some custard or a dollop of cream and all will be rectified!


I actually wish I had custard for this. That would have been amazing.

So let me try and remember what I threw into this cake :)


Apple and Date Crumble Cake
adapted from Julie Le Clerc's Apple Crumble Cake in her book Favourite Cakes

125g butter, softened
1 cup firmly packed brown sugar
2 eggs
1 teaspoon vanilla
2 teaspoons cinnamon
1 teaspoon ground ginger
1 teaspoon mixed spice
1/4 teaspoon ground cardamom
1/4 teaspoon ground nutmeg
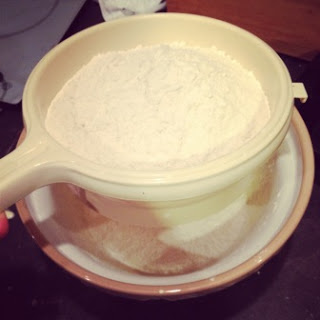
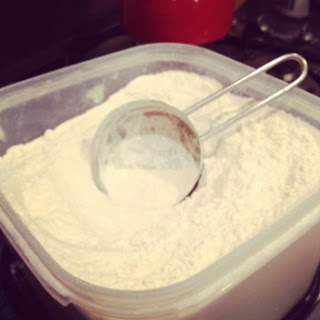
1 1/2 cups flour, sifted
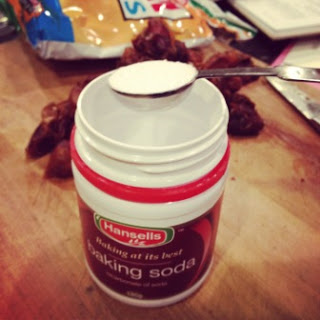
1 tablespoon baking powder
1 cup milk
1 cup dates, chopped
1 cup rolled oats
 apples, peeled, cored and sliced

for the crumble topping (you may need to increase the amount of topping if you use a larger tin)
50g butter, softened
1/2 cup brown sugar
1/2 cup flour
1/2 cup rolled oats
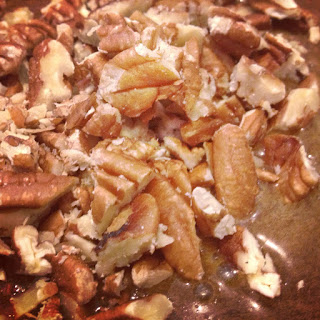
1/4 cup almonds, slivered or flaked, up to you
1/2 teaspoon cinnamon


Preheat the oven to 180 on bake.

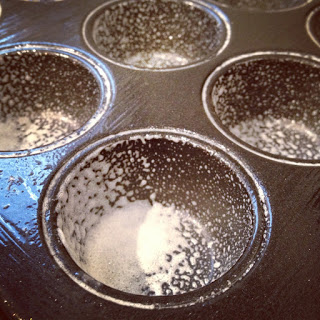
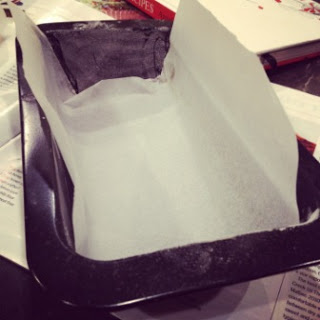
Line the base of your 20 to 25cm spring form tin (or 17x27 cm brownie tin) with baking paper. Grease the sides if you are using a round tin.

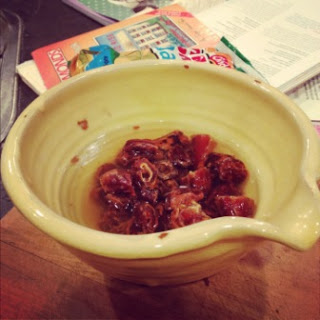
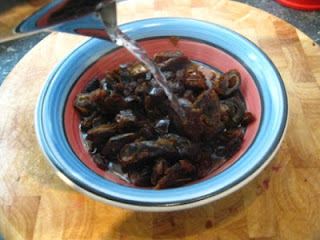
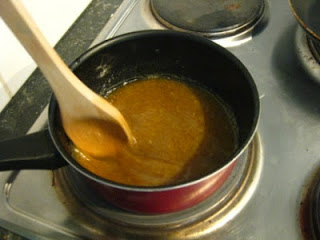
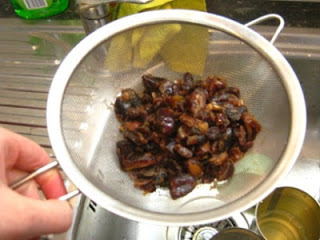
Cover the dates in hot water and leave to soften.

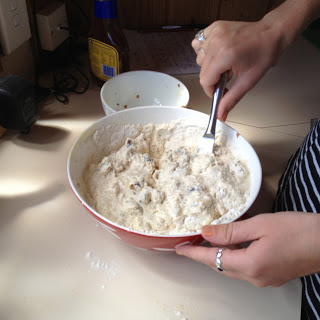
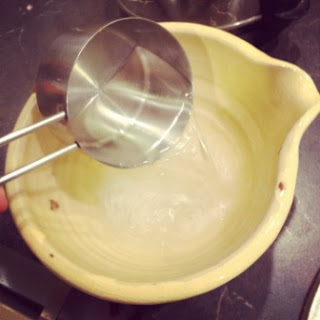
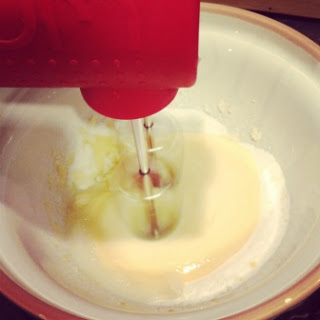
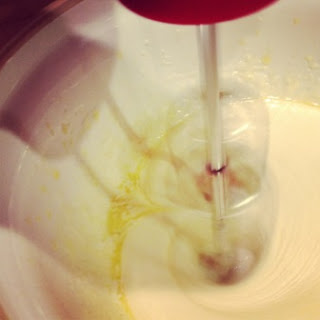
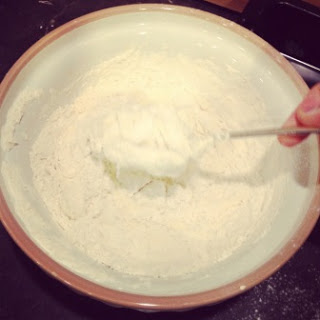
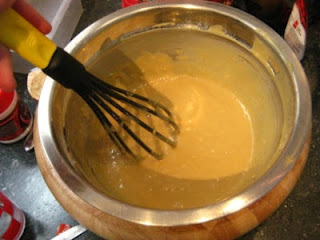
Cream together the butter and sugar. Once light and fluffy add the eggs in one at a time and beat until voluminous and fluffy.

Add in your spices and vanilla. Then gently mix in your sifted flour and baking powder as well as the oats and dates (which have been drained of excess water).

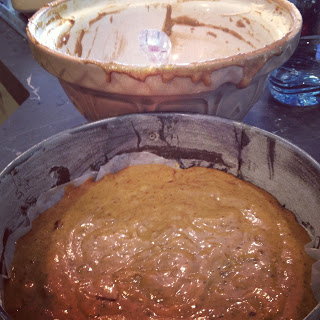
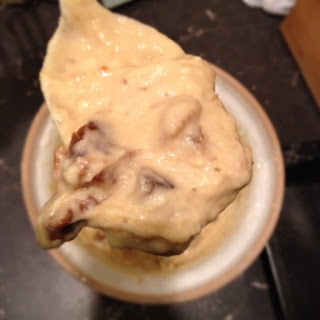
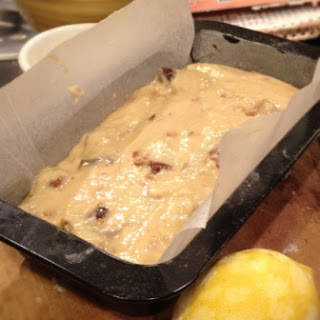
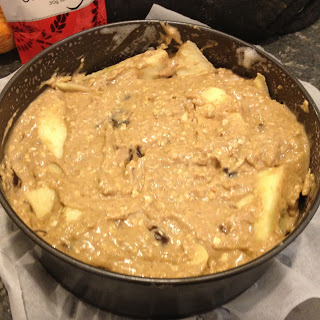
As you mix, slowly add in the milk until a more moist and slightly sloppy batter is formed.

Stir in the apple slices.

Spoon the mixture into the cake in and smooth flat.

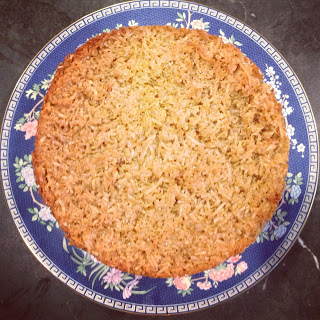
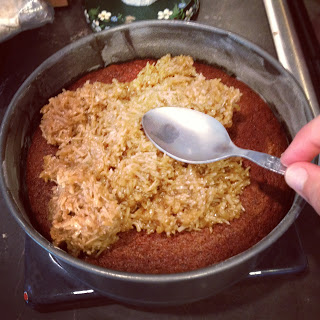
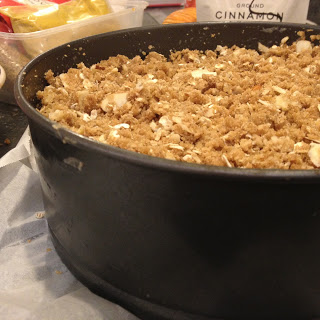
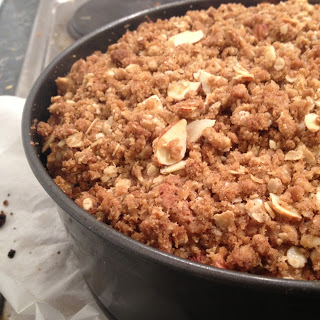
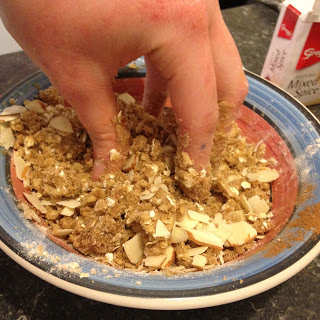
Rub together the crumble ingredients with your fingers then sprinkle over the top of the cake.

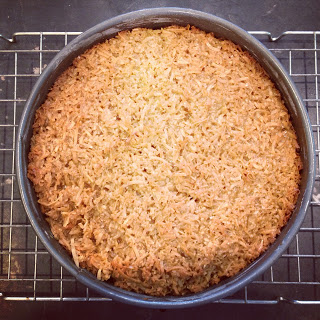
Bake in the oven until cooked. Haha when this is I do not know. I would say around an hour but I would definitely start testing it at 10 minute intervals (by inserting a skewer - if it comes out clean it is done) to see if it is done after 40 minutes. If you use a bigger tin it will take less time of course. If the crumble starts getting too brown place a sheet of tin foil over the top and return to the oven.

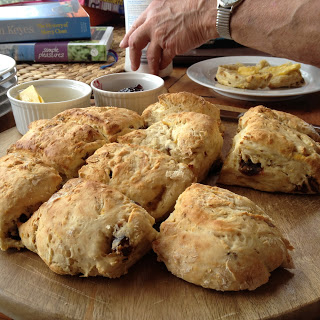
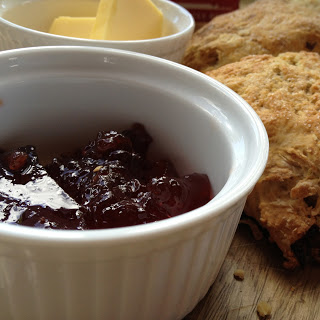
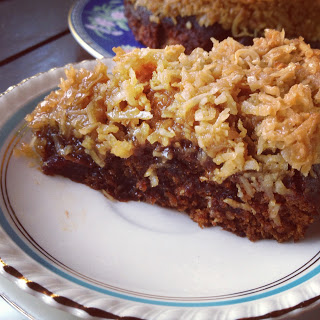
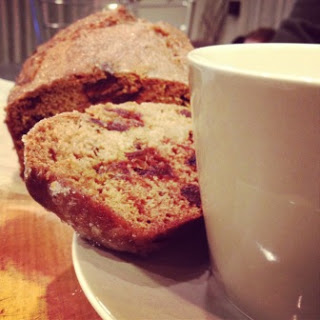
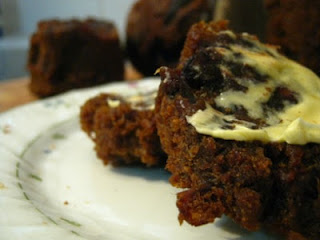
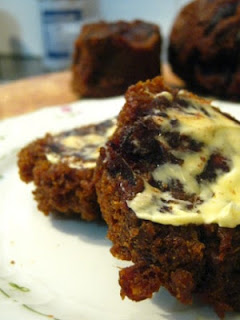
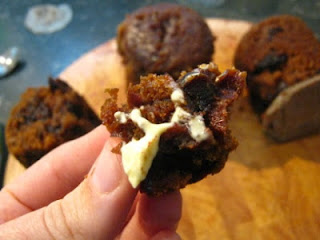
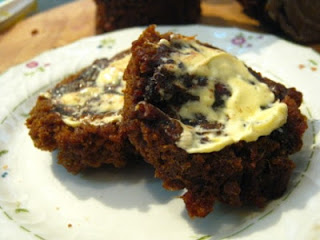
Serve warm with a good dolloping of whipped cream, ice cream or custard! (or all three . . .)


Enjoy!

Lemonade Date and Orange Scones

Greetings from Taupo Bay.


I did write this from the kitchen table looking out at the glorious ocean but due to the excellent lack of wifi in this house (I do really mean excellent - but more on that later) I am uploading this from a tiny Telecom phone booth down the road. Its a pretty sad site actually. There are four of us; Jack, Tessah, myself and some random (we can call her wifi hog) all lined up against a stone wall with our iPhones (and in my case MacBook Pro) out.


We are staying at our family friends place, I have asked them to formally adopt me so they won't be family friends for much longer! haha but if I ever write a cookbook I will ask to use this kitchen as the backdrop. 

It looks straight out onto the beach. As in drop-something-out-the-window-accidentally-and-it-will-almost-land-on-the-sand straight onto the beach. There is something about this kitchen encourages you to slow down, relax and to take the time in enjoying the cooking process. I have been itching to make bread from scratch all week (but alas! no yeast!). Oh and the light that comes in from the windows is truly magical!


The best thing about this house is the lack of reception and lack of wifi. No Facebook. No Instagram. No hobbit game (much to Jack's dismay) and no texts (not that anyone texts me anyway). I find keeping up with the previous quite tiring and stressful. Also, seeing people's overseas holiday snaps on facey ruins your own beachfront paradise. We always want what we don't have right? Plus all this lack of telecommunication has forced us into family PUZZLE TIME! (did you say that like in the drink driving ad?)


We now hate puzzles. 


Anyway, back to the magic that is the lighting. 


See? Don't these scones just looks super excellent when they are sun soaked?

What this lighting and sea view has encouraged me to do is to make copious amounts of scones. The wonderful circular chopping board they have here might have helped also as it looks excellently rustic with a batch of scones and the white ramekins of butter and jam atop it. 


The best type of scone is a date scone. A date and orange zest scone is even better. And what makes a date and orange scone even better? An easy peasy simple as recipe that basically has three ingredients (minus the dates and orange zest). 


I think I made these in pinwheel form last year (where brown sugar and cinnamon are rolled into the dough and then cooked to make pretty pinwheels which are then iced). 

However what I have not made for you are scones of the date variety.

I love dates. Date cakes, date slices, dates dates dates.

On that note, Jamal (a fellow date lover), remind me to make these for you. 


I compensate for my lack of romantic dates with the the more delicious fruit variety. I wonder why I have so few dates when I can make scones like these.

Anyway when shopping for dried dates I recommend have a good feel of the packets. Sure, when people see you fondling and groping packets of dates they will give you odd looks but finding a good, moist packet of juicy dates is far more important than the opinions of others. I find the Cinderella brand with the blue packet (not the white packet) are a decent date. 

Want to know the secret to juicy date scones?

You soak them in boiling water for five to ten minutes before draining then adding to the mixture.. What is even better is if you have a bit of orange juice lying around, pour that over them to cover then zap them in the microwave for two to three minutes, then drain and add.. Delish!

To these scones, I just soaked them in boiling water, drained them then added the juice of the orange that I zested then add the juice and the dates to the flour mix. 

I should probably  mention something about the unorthodox base ingredient list. Cream. Lemonade. Self raising flour. 

Trust me it works. It produces the most luscious, tender scones ever and you don't have to rub in a single gram of butter. The cream provides the fat content and the lemonade the sugar. You can substitute the self raising flour for standard flour with the addition of two teaspoons of baking powder for every cup of flour used. So if you have a scone craving on the way home from work or uni, stop at the dairy (Rob Roy flashes into my mind as I write this), grab a small bottle of cream and a can of sprite and whip some up in 20 minutes! 

To the flour you add equal quantities of the lemonade and cream. It usually lies at around a cup of each. Somedays, depending on the humidity you will need more or less. It doesn't have to be an exact science. The final dough should be soft and slightly sticky. Also, don't worry if there are patches of unmixed flour, it will sort itself out in the oven.

On that note I should give you Allie Edmonds (my mum)'s top tips for excellent scones.
  1. Do not over handle the dough. You will overwork the gluten and make them tough and chewy. The heat from your hands also does the dough no favours.
  2. Use a knife to mix the dough ingredients. This prevents over hand handling and just works really well.
  3. Place the scones close together on the baking tray. This will prevent them from drying out too much and will make them rise up rather than out.
  4. Pat the tops of each scone will a bit of milk just before popping in the oven. It makes the tops all nice.


With these commandments you can overcome any  preconceived scone fear you may have had. 

Lemonade Date and Orange Scones
makes 8 large scone wedges or 12 smaller squares

4 cups self raising flour (or 4 cups plain flour + 8 teaspoons baking powder)
1 cup full fat cream 
1 cup lemonade
Half a packet of dates (2 cups ish), chopped
Zest and juice of one orange

Preheat the oven to 200 degrees on bake and line a baking tray with baking paper.

Soak the dates in boiling water for five or so minutes. 

Place the flour and zest in a bowl and mix to spread the zest evenly throughout. 

Drain the dates, squeeze over the juice of the orange then add this to the flour. 

Mix the dates in with the flour to evenly distribute them.

Make a well in the centre of the flour and pour in the cream and lemonade. Use a knife to stir the mixture around until it all roughly comes together. 

Tip the dough onto a floured board or bench. 

Use your hands to do the last of the mixing, then shape the dough into a flattened circle or rectangle about 5cm thick. 

Using a sharp knife, cut the circle into eight wedges or the rectangle into 12 or 9 squares. 

Place on the baking tray with just less than a centimetre between them. Pat with milk then bake for 15 minutes or until the tops are golden. 

If you want you could sprinkle over a bit of white sugar, just to give the tops a bit of a delicious crunch.

Serve with butter and jam and prepare for the exclamations of gratitude from friends and family who will automatically assume you are some glorious creature who has spent the morning rubbing butter and flour in between your fingers. 


Enjoy!


Delicious Delicious Date and Coconut Cake

I don't make enough cakes. It's always cupcakes, slices, biscuits but no decent discs of great cake.


I am aiming to change that.

The only problem with cakes is that you kind of need a reason to bake a cake and a significant number of people so that you don't eat the whole thing by yourself.

I found out the other day that I got into the honours program for my food innovation degree. I thought that was a good excuse as any to bake a cake. I had dreams of the whole family sitting around the table to eat cake.

Alas that is not the life of the modern day working family.

I had also made chicken and sundried tomato fettucine for dinner to be ready at 6ish. My brother and I waited and waited but the parentals did not turn up. We gave up waiting and had our portions just us. Then finally at 7ish Dad walked in. Then nearing 7.30 Mum walked in. There goes the family dinner.

Oh and then Dad complained that we had eaten all the dinner. No Dad, that is what half of the chicken mixture looks like. Exactly half. Aah then their were complaints that their fettucine wasn't cooked. We thought we were doing them a favour, afterall who likes half cold stodgy pasta?

Then I watched in agony as Dad attempted to boil water and cook the fettucine, asking every thirty seconds whether it was cooked or not.

They say girls marry their fathers.

I will certainly not be marrying a man who does not know when his pasta is al dente.

Right, where was I? Aaah Cake.

Right so the time that everyone had come home, Jack's and my stomach had empties sufficiently to fit in some delicious cake. Unfortunately Mum and Dad at this exact time were beached like whales on the couch full of creamy pasta and nursing their food babies. They did not feel like cake.

Epic failure.

So I ate cake by myself. It was just as delicious as if I was eating it with company. Also no one could judge me whilst I ate a second piece. Mmmm so moist was this cake.


Oh yes, what type of cake did I make?

I recently purchased Julie Le Clerc's book; Favourite Cakes. It is full of wonderful looking cakes, from chocolate cakes to syrup cakes to cheesecakes to celebration cakes. The best part is that it only cost me $20. Win!

I love dates, they are so great. So anything with dates in it I naturally love also. I also love that delicious caramelly coconut topping that sometimes makes an appearance on top of slices or cakes.

This magical cake had both dates and the magical coconut topping! What a match made in heaven!


Mum used to make a cake similar to this one except it also had apple in it. She used to make them before she got all boring and worky and Mum and Dad actually had friends come over for lunches and the like. Seriously it was a delicious cake, who wouldn't have friends willing to come over at every possible moment if you can make a cake like that?


When I started making this cake I thought the recipe was a bit odd. The cake batter only called for 50g of butter, and you were supposed to cream this with a great deal more sugar. I tried to cream the two but it just wasn't working for me. I decided to add 20 more grams of butter. That seemed to do the trick.

So once all the egg, butter and sugar was fluffed together, you then had to ruin this beautiful aerated emulsion by pouring in all the dates and their cup of hot soaking water turning the fluff into a sloopy (yes sloopy) mess. Arrg??? so much confusion.


Anyway the end result was absolutely devine! Well worth making. It is very rich so I don't suggest you have it after a heavy meal such as our cream laden fettucine. The topping is supposed to have orange blossom water but unfortunately I felt too poor to go and buy some. If you do have some, add a tablespoon or so into the topping and let me know how it turns out! I also am having a bit of a thing with making things nice and spicy. The recipe said to add just cardamom but I went ahead and added some nutmeg, cinnamon and ginger. I think it is just the time of year when everything is nice and spicy, why not let this cake join in on all of the fun?

Also, just to note that I used a 22cm tin rather than the 20cm. This means my cake was a little flatter than it was supposed to be. It just meant a greater topping to cake ratio haha.


Arabian Date Cake
Adapted from Julie Le Clerc's Favourite Cakes
Makes a 20cm cake.

170g pitted dried dates, chopped
1 cup water
1 teaspoon baking soda
70g butter, softened
3/4 cup firmly baked soft brown sugar
1 egg
1 cup plain flour
1 teaspoon baking powder
2 teaspoons ground cardamom
1/4 teaspoon ground cinnamon
1/4 teaspoon ground nutmeg
1/4 teaspoon ground ginger

Topping:
50g butter
2 tablespoons cream
1/2 cup firmly packed soft brown sugar
1 1/2 cups of long threaded coconut.

Preheat the oven to 180 degrees on bake and prepare a 20cm spring form tin with baking paper.

Place the dates, water and baking soda in a sauce pan and bring to the boil, turn down the heat and leave to simmer for 3 minutes. Set aside to cool.

Cream together the butter and sugar until pale and fluffy. Add in the egg and beat until nice and volumous.

Stir in the cooled date mixture forming a sloppy and sloopy mixture.

Sift in the flour, baking powder, cinnamon, cardamom, ginger and nutmeg and stir gently to incorporate into the mixture.

Pour the mixture into the prepared tin and bake for 40 minutes or until a skewer, when inserted, comes out clean. Remove the cake from the oven whilst you prepare the topping.

In a small sauce pan, melted together the cream, butter and sugar. Heat until a medium dark to golden colour is formed. Stir in the coconut.

Spoon this mixture over the top of the cake evenly and then return the cake to the oven for another 15 minutes so that the topping turns a wonderful golden brown.

Remove from the oven and leave to cool completely in the tin before serving.

Serve with a nice big dollop of whipped cream. That would be great.


Enjoy!


Mini Date and Pecan Pies

Hello there,

Yesterday I showed you how to make mini pumpkin pies. Knowing how to make these absolutely to-die for pecan versions and not sharing with you is just cruel.


I once tried a pecan pie slice. It was amazing. It was the best thing I had ever tasted. It was nutty and caramelly. Words really cannot describe it's excellence.

These are definitely worth the hideous amount you pay for pecan nuts (we are talking $6/100g). The best thing about these ones is that you only need one nut per pie. So say you are making 30, you only need 30 nuts. Although I did chop a few up and pop them in the mixture. I don't think you need to do that though.

You will make friends for life with these pies. They are that good. Pretty sure a few boys could be seduced with these things too.


I found a recipe for baby pecan pies on Jo Seagars website which was really simple. I then found another pecan pie variation with dates in them on the Fisher and Paykel blog. I love dates, sure I coudn't afford fresh ones but I could use dried ones to bulk up the pecan pie mixture so I could get more bang for my buck. The dates leant a lovely dark sugary caramel flavour to the pies, more than what the brown sugar lends. I soaked my dates in hot water for a few minutes then chopped them up. This way they became nice and juicy.

As I had far too many things to do, I decided to cheat in the pastry department. I don't have a food processor to help me out and my skills in the pastry department are significantly lacking. I'm sorry. I have let you down.


To cut out the pastry to fit the mini muffin trays I used, I used the lid of a marmite jar. The cut out you use needs to have a diameter of 5-6cm. Luckily I was lent the most amazing of tools for helping me line the muffin trays. Before making these I had never seen a tart tamper in my life (probably due to my avoidance of all things pastry). It fit perfectly into the muffin trays and allowed me to press the pastry in evenly and without forming lump or hole. Try spraying your tamper with a bit of baking oil then dipping it in some flour. This will stop it from sticking the the pastry when you press it in. Those little toys are genius!


Luckily Alix prefers the pumpkin pies whilst I am team pecan, so no arguments over who gets the last one there :).

Mini Date and Pecan Pies
Adapted from Jo Seagar's recipe 
makes 30

2 sheets, pre rolled sweet crust pastry
24 pecan nuts (1 cup)
1/2 cup dried dates, soaked in boiling water, drained and finely chopped
1 egg
60g butter, melted
1 cup brown sugar
1 teaspoon vanilla

2 mini muffin trays
baking spray
rolling pin (or a bottle of cider haha)
flour for dusting the bench with
5-6cm circle cutter (eg a marmite lid)
a tart tamper (or fingers if aesthetics aren't of the biggest concern)


Preheat the oven to 180 degrees on bake. Spray the mini muffin trays generously with baking spray.

Flour the bench and carefully roll out the prerolled pastry a little thinner (so it stretches out another cm or so in both directions).

Take the cutter you are using and cut circles out of the pastry. Using the tart tamper or your fingers, carefully line each muffin tray with pastry shells.

Place a pecan nut inside each shell, you can break them into smaller bits if you wish.

In a bowl, whisk together the melted butter, sugar, egg and vanilla. Mix in the mushy dates. Whisk until the mixture is thick and 'gluey'.

Spoon a teaspoon and a bit of the mixture into each pie shell.

Bake for 17 minutes or until the pastry is golden.

Leave to cool for a few minutes before twisting each pie to release it from the muffin tray. Leave them to cool on a wire rack or clean tea towel.

Don't forget to respray the tins for the next lot that you cook. They can easily become very stuck if there is any left over pastry crumbs in the bottom too.


Mini Pumpkin and Mini pecan pies :)

These are best served warm. If you are making these in advance, store them in an air tight container once they are fully cool. You can heat them up for a few seconds in the microwave.

Enjoy! (I know we did :))

Sophie x


Date, Walnut and Lemon Syrup Loaf

Good evening all from rainy Auckland!

I am home for the mid year uni holidays. I have been home a week and already I have watched three seasons of Greys Anatomy, baked four batches of cupcakes and two batches of cookies for Mum. I am bored of the basics and in need of something new and exciting. I really want to make a pink ombre pastel cake, that might be tomorrow's activity.


When I get bored at home, I pull out all of Mum's recipe books searching for inspiration and pretty pictures haha.


In today's Sunday Star Times' Sunday insert, there was a feature by Ray McVinnie. In this feature there was a recipe for these date, walnut and lemon syrup loaves. Since I am a fan of McVinnie's work I decided to give them a try. They looked so nicely styled in the photo.

I am so glad I gave them a go. Chris even liked them. The dates made it rich and moist and the sugar syrup goes crunchy on the top. All with a subtle lemony flavour going on in the background. Oh wait and the crunchy walnuts. Don't forget the walnuts!

Ray McVinnie's Date, Walnut and Lemon Syrup Loaf
(from Sunday 24.06.2012)


1 teaspoon baking soda
1 cup boiling water
1 cup chopped dried dates
1 egg
1 cup caster sugar
2 tablespoons melted butter
2 cups flour
1 teaspoons baking powder
zest of 1 lemon
1 cup walnut pieces

Pre-heat the oven to 175 degrees and line a loaf tin with baking paper.

Dissolve the baking soda in the hot water, then add the chopped dates. Let these soak.

Beat the egg and sugar together until thick and a pale yellow colour. Stir in the melted butter. Sieve in the flour and baking powder and add the lemon zest. Fold these in. Stir in the date mixture (including the water) and the walnuts.

Pour the mixture into the loaf tin and bake for 40-45 minutes or until a skewer comes out clean.

Mix together the juice and zest of 1 large lemon and half a cup of caster sugar and pour this cold mixture over the hot loaf (as in as soon as it comes out of the oven hot).


Once cooled slightly, slice into nice chunky slices and cover in butter :) This is best served still warm and with a cup of tea.

Enjoy!!

Mini Date Loaves

Hello world!

So this is the alternative to writing up something about product feasibility for this assignment I have to do. I have also run out of Vampire Diaries to watch. I now have to wait a week for a single episode. So I have resorted to following the actors on Twitter. Sad I know.

Recently I have had a bit of a biscuit addiction. It has been terrible. It all started when Lucy brought dow four packets of biscuits from home. They were opened one packet at a time and slowly (or in the case of one pack very quickly) they were consumed. Then I started buying my own biscuits and I went rapidly down hill from there. So as it stands I am currently on my first day of biscuit cold turkey. No biscuits for me today. It is 8.23pm and I am going strong. However the other day (as in yesterday) I remembered these date loaves Mum used to make all the time. They were steamed on the stove for an hour in old tin cans and didn't contain any fat (well apart form the like 0.01% in the trim milk). So I got the recipe off her and decided to try them out. The ingredients are simple: Flour, baking soda, golden syrup, milk, ginger and dates. Even though they don't have butter or oil in them they are still extremely moist and cakey. Oh and did I mention they were fat free? (Let's assume that we will burn off the sugar in them and not store that as fat).

This was the second batch I made


So you will need:
1 cup flour
1 cup sultanas/dates
1 teaspoon baking soda
1 teaspoon all spice (sultanas)/ground ginger (dates)
1/2 cup golden syrup
1 cup milk

3 clean tin cans
1 large stock pot with lid

Firstly, soften the fruit by pouring boiling water over the top of them. They will absorb up some of the water, making them juicier.

In a saucepan on a low heat, melt the golden syrup and milk together, be careful not to let a skin of milk on the bottom of the pan form so keep stirring.

Sift the dry ingredients together. Add the golden syrup and milk mix once it has melted together. Drain and add the fruit then mix well.

Grease the sides of 3 clean with butter and flour. Cut out circles of baking papers small enough to fit the bottom of the tin.

Pour the mixture evenly in to each of the three tins, they should be near 2/3 to 3/4 full.

Place enough hot water in your stock pot to reach up to the height that the batter reaches on the inside (remembering that the cans will displace some water when you place them in). Place the cans in the pot, pop on the lid and then leave to simmer on a low heat.

Check (using a skewer) after an hour to see if they are done (the skewer, when inserted should come out clean). If the skewer comes out covered in batter then leave them steaming for an additional 10 minutes to half an hour.

Let them cool for 10 minutes or so then run a knife around the edge of the tin to loosen. Then Bang them upside down onto the bench and they should come out cleanly.

 So here goes the recipe in pictures :)

 Soften your fruits with hot water.

 In a saucepan, melt your golden syrup and milk together.


 In a bowl, sift your dry ingredients together.


 Make sure you keep an eye on your milk.

 Add the milk and golden syrup mix to the dries and mix well as to remove any lumps.

 Drain your fruit well and then add those into the mix.

 Mix it all together.

 Line and grease your tins.

 I had high expectations with four.


 Prepare your stock pot.

 Pop on the lid and let them be for an hour. Test them after an hour and leave for an additional 10 minutes to half an hour if needed.

 And voila! They are done.

 Let them cool for 10 minutes or so then run a knife around the edge of the tin to loosen. Then Bang them upside down onto the bench and they should come out cleanly.


 Slice into pieces and smother with a good dosing of margarine or butter.


And there you have it. Moist tasty date loaves. Fat free (until you cover them in butter), egg free and most importantly, oven free! Yay minimal power expenditure.

Hope you try these out. I am going to have to make them again after Alix, Lucy and I managed to gobbled them all up last night.

Bye!

Here is an instagram picture:)