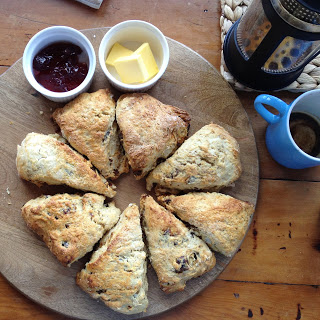
Peachy Keen: Peach, Blueberry and Raspberry Pie

It is Summer.

Not for much longer though.

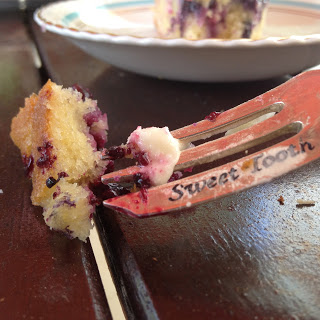
So why not preserve what we have left of the beautiful Summer stone fruit and berries and turn them into a delicious pie!


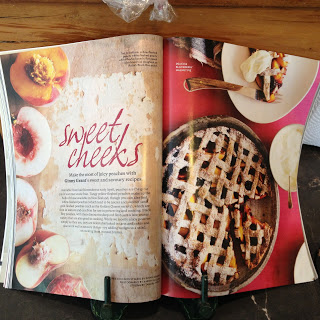
This pie features on the cover of Cuisine Magazine. Not this pie of course! But the recipe. It looked rather delicious and the picture of it inside the pages looked wonderful and rustic! My kind of pie.


I am liking things that are not perfect. I like a bit if imperfection. It looks like more love has gone into it and isn't the result of mass production.

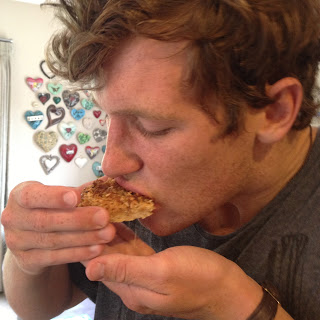
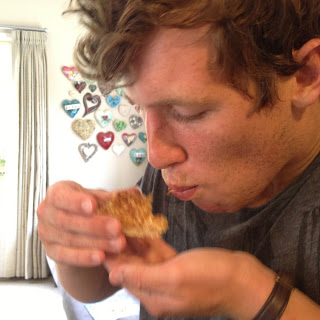
I am saying this before I make my pie. I have never made my own pastry before so before I started I had to accept that the crust would not be even and that the lattice would not be latticed! I even accepted that this pie could taste absolutely terrible! But it was all about the learning process and making my first pie. Because we must all start somewhere.


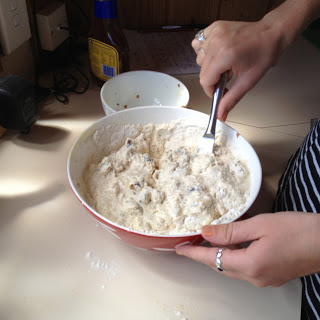
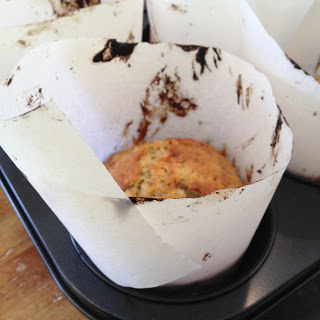
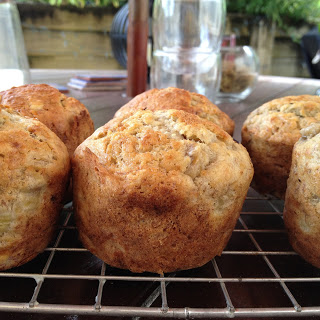
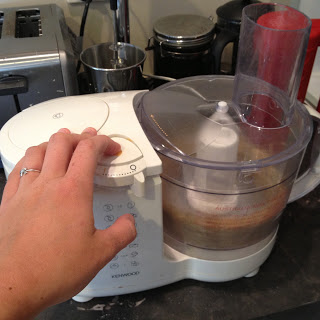
Recently I have become fixated with the idea of food processors. We have this horrible big clunky thing that we never use because Mum can't be bothered taking it out of the drawer (and all the crash bang and clanging that goes along with it!). My 21st birthday is coming up and on my wish list (it is a very short list due to the nature of the items) are a cream coloured Kitchenaid artisan stand mixer and its matching food processor. I don't know if I will be lucky enough to get the processor but I am still preparing my skill set for when I do get one! So in my processor obsession my eyes locked onto this recipe in Cuisine. It never occurred to me to make my own, I usually opened a packet from the freezer. Golly gee whizz have I been missing out all these years!


The walnut pastry was the easiest thing to whip up! and so quick as well! I highly recommend giving it a go.

Where pastry and I stop seeing eye to eye is in the rolling and lining of the tart tin.

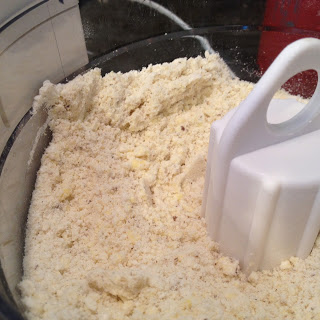
You use cold butter when making the pastry. You refrigerate the pastry. You handle it as little as you can. This is so the butter doesn't melt into the flour and sugar but instead forms small solid particulates which then melt when baked creating a beautiful crisp pastry!

Unfortunately it gets rather hot in our kitchen and so the last golden rule was broken. The pastry kept sticking to my rolling pin and the baking paper I was rolling it out onto. I kept having to regroup and re roll. This made the dough all soft, squidgy and sticky. If this is the case you should probably chuck the lined tin in the freezer for half an hour or so to re-harden before filling with the fruit before finally throwing in the oven.


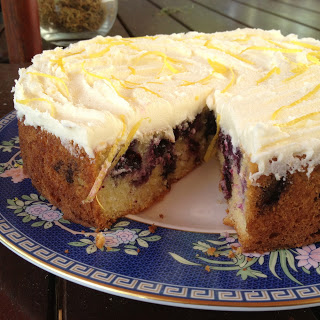
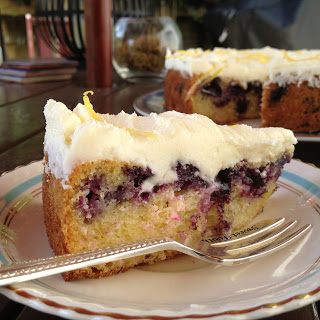
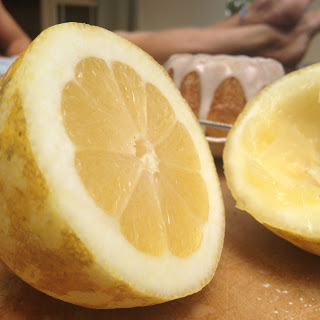
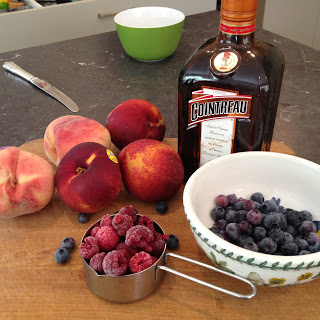
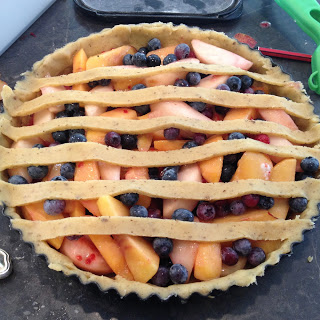
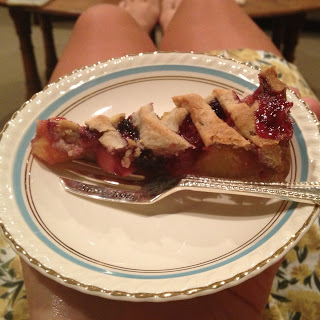
I used 2 peaches and 3 nectarines for this. Nectarines are just peaches without the fur and are called nectarines purely for marketing purposes. I also find using the Hunny nectarines makes it a whole lot sweeter and you get that glorious golden yellow colour.

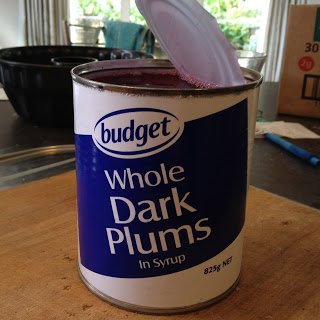
The original recipe said to use blackberries. It also said you could substitute them for blueberries or raspberries. Why not both?

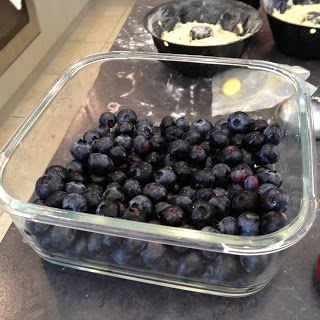
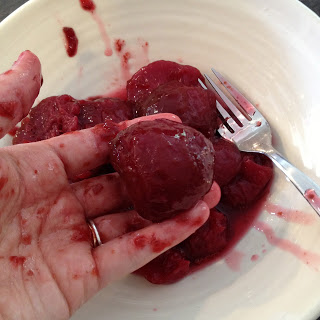
When we went to Onemana on the Coromandel last weekend we found that my auntie's house had a blueberry tree. We may or may not have totally stripped said tree of all blue fruit! This gave us about a cup and a half of delicious and free (!!!) fruit! Needing to use this fruit I decided to pop it in this pie!

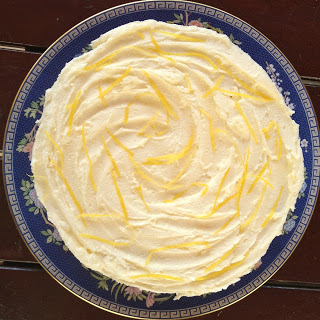
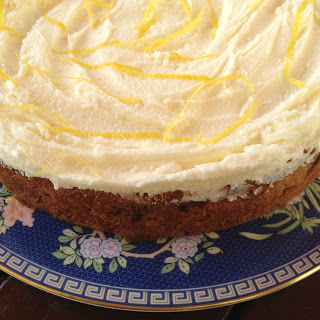
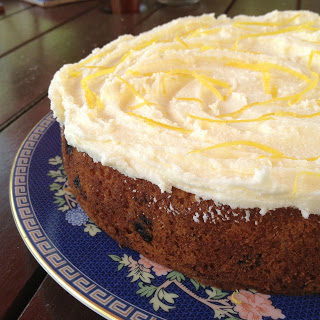
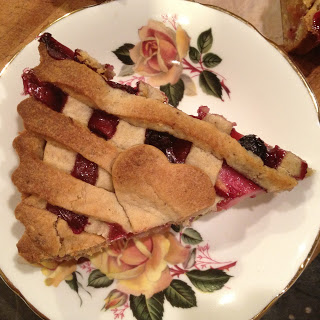
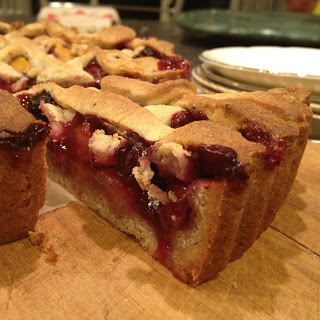
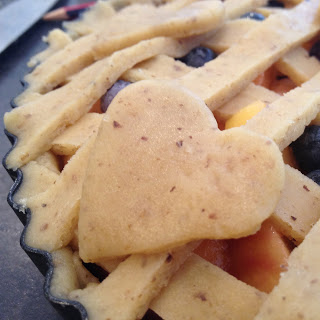
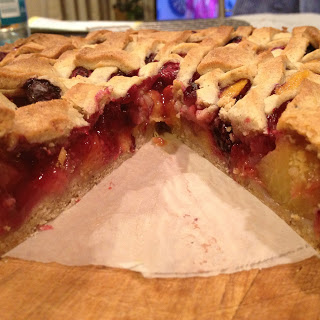
The walnut pastry turned out beautifully in the end. The walnuts lent a lovely nutty brown colour to it making it slightly less garish than the usual sweet crust pastry. Oh and lets not forget that it tastes excellent as well!


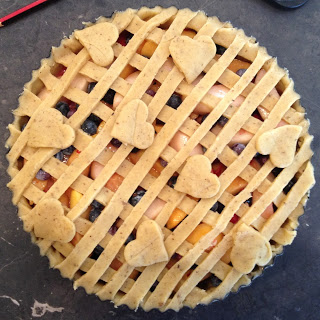
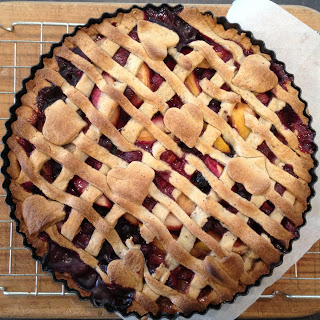
Oh and since tomorrow is Valentines Day why not put some wee hearts on the top?

(Ugh Valentines Day. I have a hot hot date!  . . . with my cousin Hannah!!!! :) )


Right lets do this shall we?


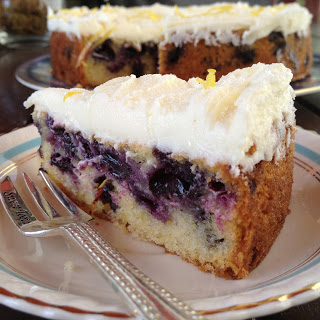
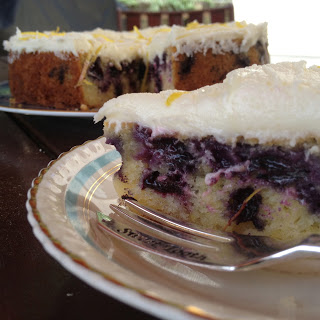
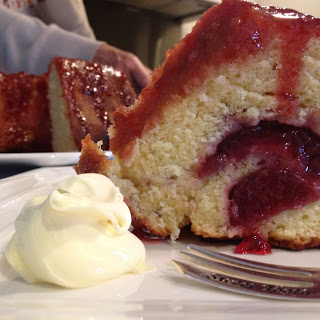
Peach, Blueberry and Raspberry Walnut pie
Adapted from Cuisine Magazine issue 156, January 2013
Makes 25cm diameter pie

For the pastry:
100g icing sugar
300g plain flour
75g walnut crumbs (walnuts that have been blasted in the food processor)
pinch of salt
200g chilled butter, cubed
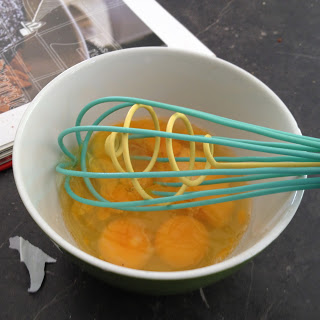
2 eggs, beaten

For the filling:
5 peaches/nectarines, peeled and sliced
1 1/2 cup berries (fresh or thawed), can be made up of blackberries, blueberries, raspberries.
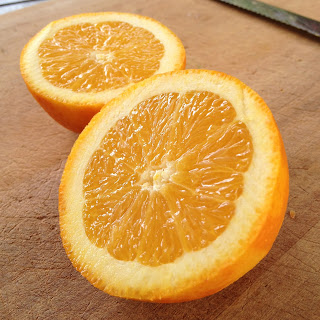
2 tablespoons orange liqueur or brandy
3 tablespoons caster sugar
2 tablespoons cornflour


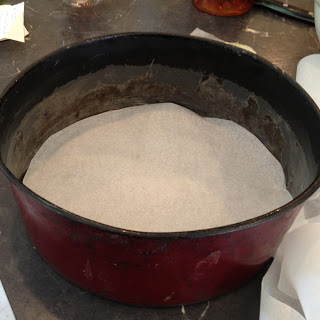
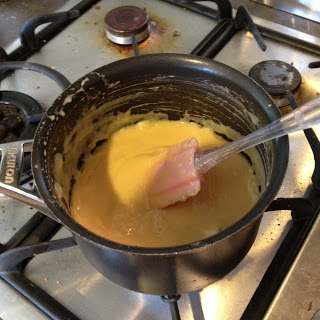
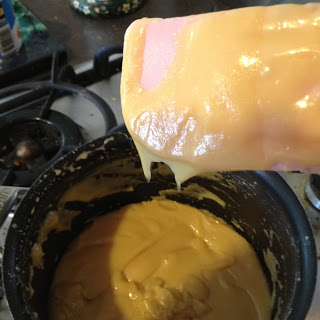
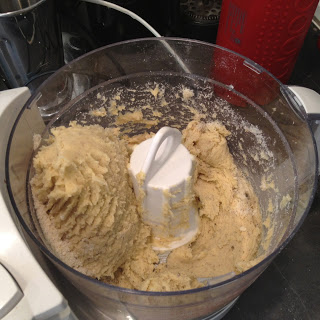
In a food processor, whizz together the flour, salt, sugar and walnut crumbs together to evenly distribute everything. Drop the butter in whilst still whizzing) cube at a time until the mixture takes on a sandy consistency. Add the eggs and pulse until the dough just comes together.

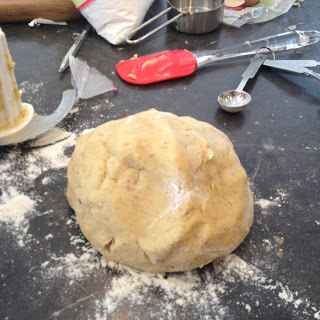
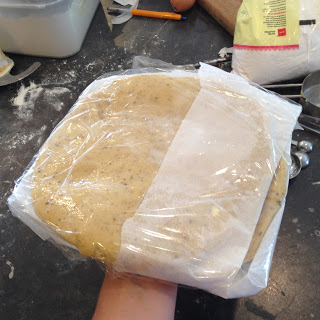
Tip the dough onto a floured bench, bring into a ball then divide the mixture in half. Form discs out of each half, wrap in glad wrap and refrigerate for at least an hour.

Preheat the oven and baking tray to 200 degrees bake.

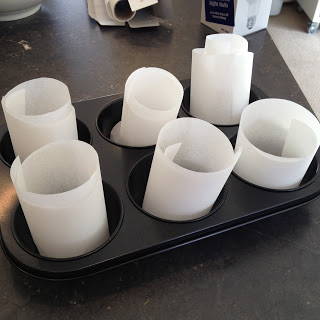
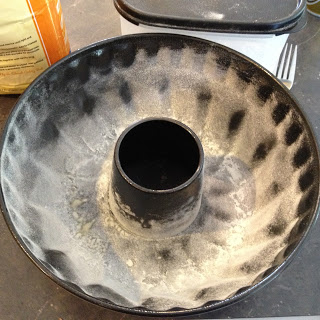
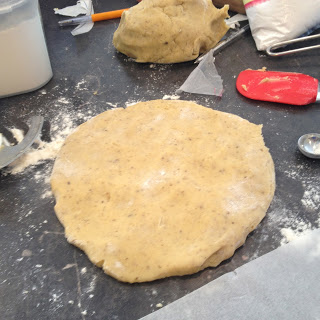
Roll one disc out on a large sheet of baking paper until it is about half a centimetre in thickness (and large enough to line a tart tin - diameter + height + height).

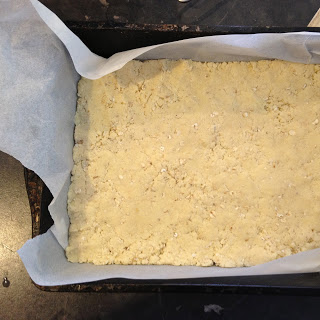
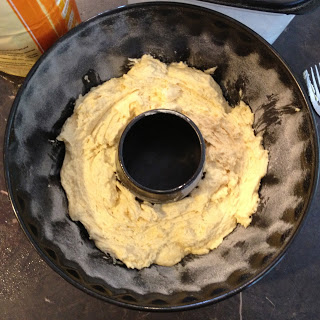
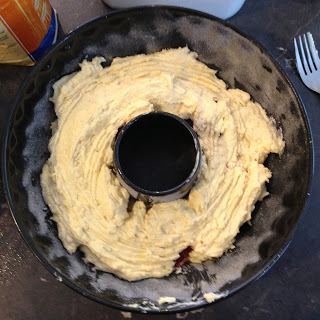
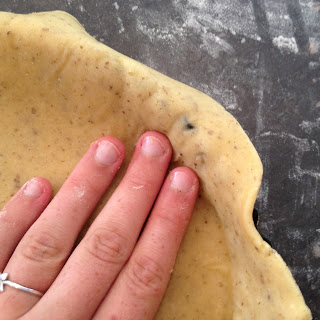
Drape the pastry over the tin and gently press into place. Patch up any holes with scrap pastry. Use a Flat edged knife to trim the edges nice and flat.

Leave the other disc in the fridge until it is time to lattice the top.

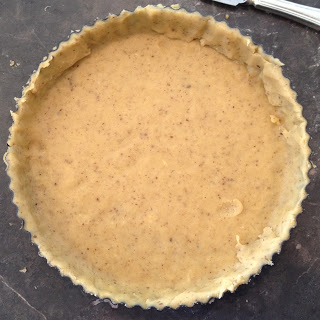
Place the lined tin in the freezer while you prepare the filling.

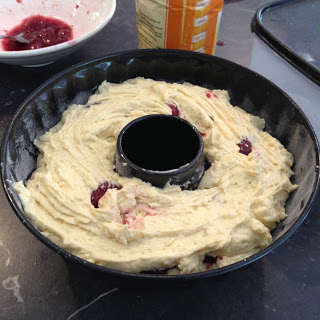
To prepare the filling, in a large bowl, mix together the sugar, orange liqueur and caster sugar. Add the fruit and gently toss until everything is coated.

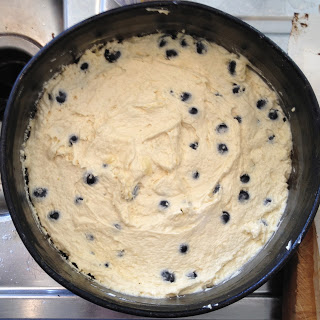
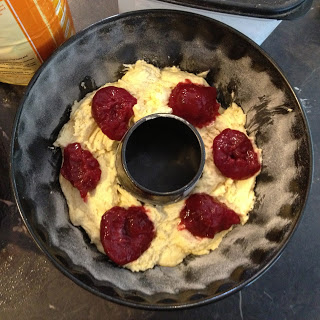
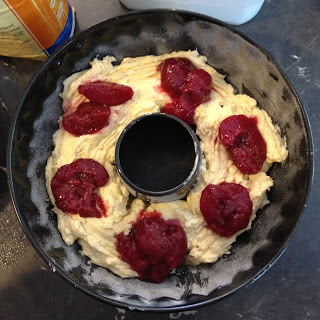
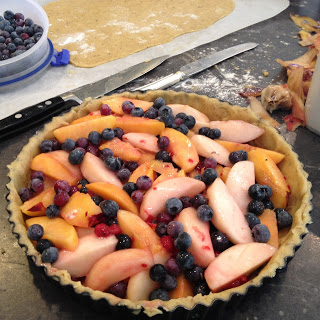
Remove the tin from the freezer. Scatter the fruit evenly into the pastry case.

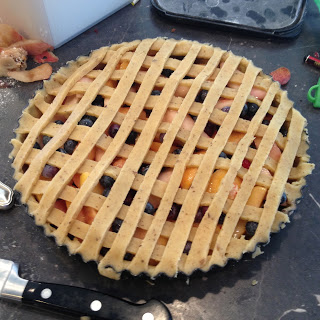
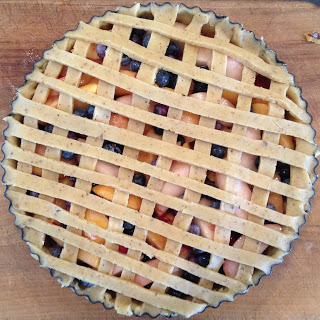
Take the second disc, roll it out until 5mm thickness then cut thin strips. Completely cover the pie in parallel strips. Then cover with a second layer of strips perpendicular to the first layer. Cut out hearts if you wish.

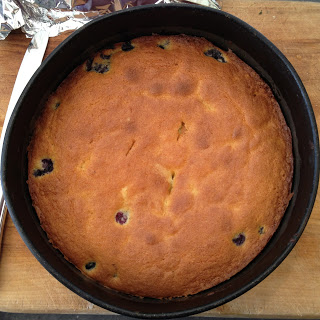
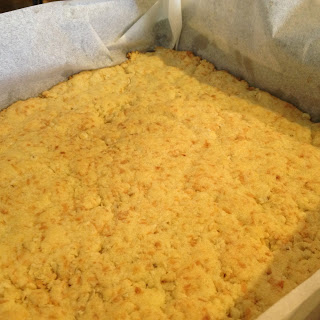
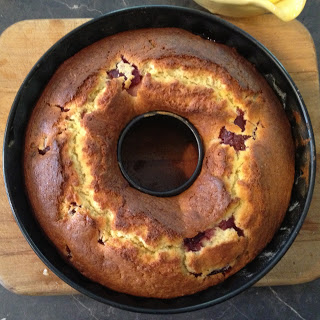
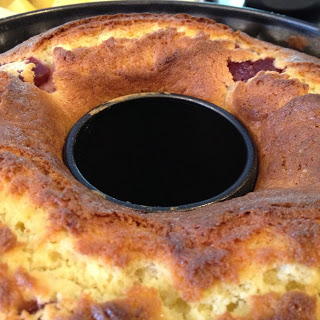
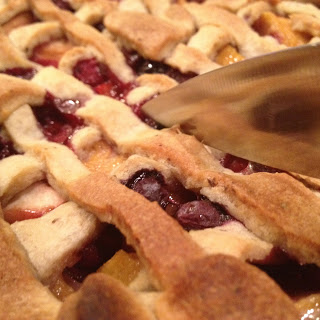
Bake for 30 minutes on top of the baking tray (this crisps up the bottom). Then turn down the temp to 180 degrees for another 25 to 30 minutes. If the pastry gets too brown place some tin foil over the top for the remainder of the time left.

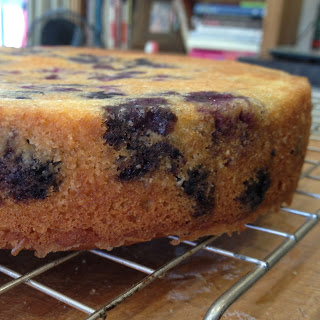
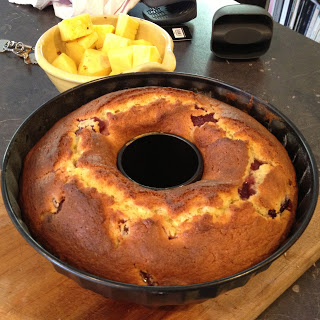
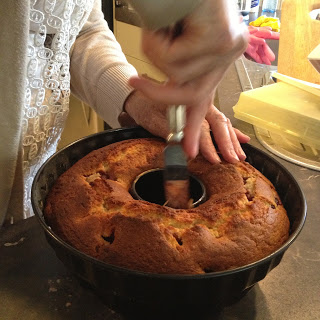
Remove from the oven and leave to cool for half an hour or so before removing from the tin. You want the pastry to be cool enough so that it doesn't break.

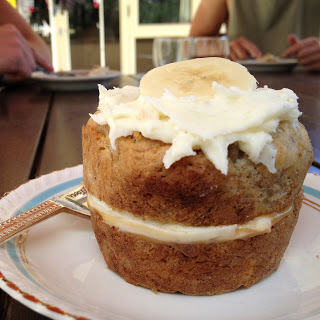
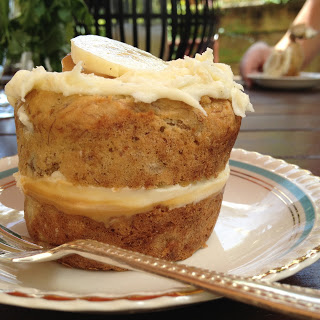
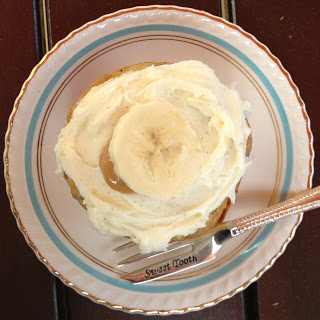
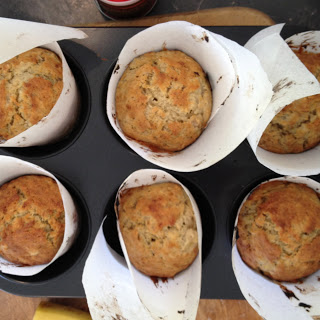
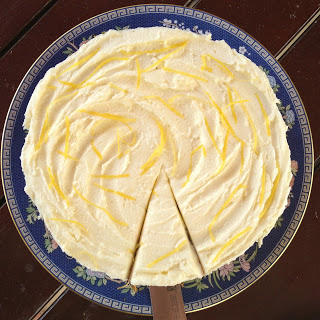
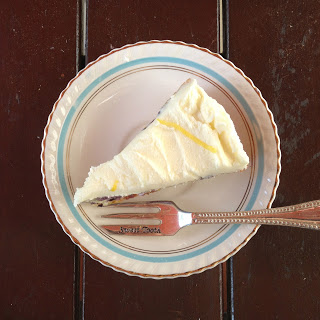
Cut into nice big slices and serve with whipped cream or a really good vanilla bean ice cream!


Enjoy!!


Lemonade Date and Orange Scones

Greetings from Taupo Bay.


I did write this from the kitchen table looking out at the glorious ocean but due to the excellent lack of wifi in this house (I do really mean excellent - but more on that later) I am uploading this from a tiny Telecom phone booth down the road. Its a pretty sad site actually. There are four of us; Jack, Tessah, myself and some random (we can call her wifi hog) all lined up against a stone wall with our iPhones (and in my case MacBook Pro) out.


We are staying at our family friends place, I have asked them to formally adopt me so they won't be family friends for much longer! haha but if I ever write a cookbook I will ask to use this kitchen as the backdrop. 

It looks straight out onto the beach. As in drop-something-out-the-window-accidentally-and-it-will-almost-land-on-the-sand straight onto the beach. There is something about this kitchen encourages you to slow down, relax and to take the time in enjoying the cooking process. I have been itching to make bread from scratch all week (but alas! no yeast!). Oh and the light that comes in from the windows is truly magical!


The best thing about this house is the lack of reception and lack of wifi. No Facebook. No Instagram. No hobbit game (much to Jack's dismay) and no texts (not that anyone texts me anyway). I find keeping up with the previous quite tiring and stressful. Also, seeing people's overseas holiday snaps on facey ruins your own beachfront paradise. We always want what we don't have right? Plus all this lack of telecommunication has forced us into family PUZZLE TIME! (did you say that like in the drink driving ad?)


We now hate puzzles. 


Anyway, back to the magic that is the lighting. 


See? Don't these scones just looks super excellent when they are sun soaked?

What this lighting and sea view has encouraged me to do is to make copious amounts of scones. The wonderful circular chopping board they have here might have helped also as it looks excellently rustic with a batch of scones and the white ramekins of butter and jam atop it. 


The best type of scone is a date scone. A date and orange zest scone is even better. And what makes a date and orange scone even better? An easy peasy simple as recipe that basically has three ingredients (minus the dates and orange zest). 


I think I made these in pinwheel form last year (where brown sugar and cinnamon are rolled into the dough and then cooked to make pretty pinwheels which are then iced). 

However what I have not made for you are scones of the date variety.

I love dates. Date cakes, date slices, dates dates dates.

On that note, Jamal (a fellow date lover), remind me to make these for you. 


I compensate for my lack of romantic dates with the the more delicious fruit variety. I wonder why I have so few dates when I can make scones like these.

Anyway when shopping for dried dates I recommend have a good feel of the packets. Sure, when people see you fondling and groping packets of dates they will give you odd looks but finding a good, moist packet of juicy dates is far more important than the opinions of others. I find the Cinderella brand with the blue packet (not the white packet) are a decent date. 

Want to know the secret to juicy date scones?

You soak them in boiling water for five to ten minutes before draining then adding to the mixture.. What is even better is if you have a bit of orange juice lying around, pour that over them to cover then zap them in the microwave for two to three minutes, then drain and add.. Delish!

To these scones, I just soaked them in boiling water, drained them then added the juice of the orange that I zested then add the juice and the dates to the flour mix. 

I should probably  mention something about the unorthodox base ingredient list. Cream. Lemonade. Self raising flour. 

Trust me it works. It produces the most luscious, tender scones ever and you don't have to rub in a single gram of butter. The cream provides the fat content and the lemonade the sugar. You can substitute the self raising flour for standard flour with the addition of two teaspoons of baking powder for every cup of flour used. So if you have a scone craving on the way home from work or uni, stop at the dairy (Rob Roy flashes into my mind as I write this), grab a small bottle of cream and a can of sprite and whip some up in 20 minutes! 

To the flour you add equal quantities of the lemonade and cream. It usually lies at around a cup of each. Somedays, depending on the humidity you will need more or less. It doesn't have to be an exact science. The final dough should be soft and slightly sticky. Also, don't worry if there are patches of unmixed flour, it will sort itself out in the oven.

On that note I should give you Allie Edmonds (my mum)'s top tips for excellent scones.
  1. Do not over handle the dough. You will overwork the gluten and make them tough and chewy. The heat from your hands also does the dough no favours.
  2. Use a knife to mix the dough ingredients. This prevents over hand handling and just works really well.
  3. Place the scones close together on the baking tray. This will prevent them from drying out too much and will make them rise up rather than out.
  4. Pat the tops of each scone will a bit of milk just before popping in the oven. It makes the tops all nice.


With these commandments you can overcome any  preconceived scone fear you may have had. 

Lemonade Date and Orange Scones
makes 8 large scone wedges or 12 smaller squares

4 cups self raising flour (or 4 cups plain flour + 8 teaspoons baking powder)
1 cup full fat cream 
1 cup lemonade
Half a packet of dates (2 cups ish), chopped
Zest and juice of one orange

Preheat the oven to 200 degrees on bake and line a baking tray with baking paper.

Soak the dates in boiling water for five or so minutes. 

Place the flour and zest in a bowl and mix to spread the zest evenly throughout. 

Drain the dates, squeeze over the juice of the orange then add this to the flour. 

Mix the dates in with the flour to evenly distribute them.

Make a well in the centre of the flour and pour in the cream and lemonade. Use a knife to stir the mixture around until it all roughly comes together. 

Tip the dough onto a floured board or bench. 

Use your hands to do the last of the mixing, then shape the dough into a flattened circle or rectangle about 5cm thick. 

Using a sharp knife, cut the circle into eight wedges or the rectangle into 12 or 9 squares. 

Place on the baking tray with just less than a centimetre between them. Pat with milk then bake for 15 minutes or until the tops are golden. 

If you want you could sprinkle over a bit of white sugar, just to give the tops a bit of a delicious crunch.

Serve with butter and jam and prepare for the exclamations of gratitude from friends and family who will automatically assume you are some glorious creature who has spent the morning rubbing butter and flour in between your fingers. 


Enjoy!


Baby Banana and Caramel Cakes with Vanilla Bean Cream Cheese Icing

I tried to explain to my parents that baking Jack banana cakes was a sibling bonding activity and that they should appreciate the fact that we don't fight and hate each other and therefore is totally necessary.

They bought it.


 Yuss another baking escapade completed without too much parental hate. Having me in the house is like living in a bakery. You get chubs. There is always cake or something delicious around to munch on. I think they enjoy it when I leave. Wait, there is no 'I think' about it. I know they love to see me hop on that plane to Dunedin where they don't have to see/live with me for months at a time.

Anyway Jack and his friend Will (Hi Will!) were going to the gym together and they needed post gym nutrition. I don't know where they got the idea that banana cake was a good option for post exercise sustenance but regardless, I was going to be the source of this cake.

Ever since receiving my Treats from Little and Friday book for Christmas I have been wanting to try something out.


The problem with this book, whilst it looks beautiful, all the recipes have hideous quantities of ingredients and last time I checked I didn't have my body weight of eggs and chocolate lying around the house. The same with the ground nuts that are required for a few of the cakes. Seriously, who can afford 4 cups of ground hazelnuts for a spot of afternoon treat baking?

The one small cake recipe that wasn't atrociously expensive to make was the mini banana cakes. They used the recipe from the Edmonds cookbook but frilled it up with a few lashing and dashings of cream cheese icing, mascarpone and caramel.


It said it would make 12 small texan muffin pan sized cakes.

Negative.

It said to use a texas muffin tin that had the sides lined up with baking paper so that the cakes could be made quite tall. I ended up making 6 smallish texas sized ones (I didn't know how far to fill them so a erred on the side of caution) and used some of the left over batter to make 3 small baby bundt ones. The batter definitely wouldn't have made 12 large ones. Awkward.


The next weridity was the amount of mashed banana the recipe required. Your standard banana cake recipe calls for around about 3 ripe bananas.

Haha but not this one.

It called for three CUPS of mashed banana. I mashed up four bananas and that only achieved one and a half cups. Who has eight bananas lying around for SIX wee cakes. I am hoping it was a typo. I only added four bananas worth. You could probably increase this to five bananas and that would make it quite moist but also a wee bit on the dense side.

I don't know about you but I am all into simple methods. Methods that are minimalist on the word front because seriously who can be bothered reading methods when there is cake to be had! The method for these had a crazy number of steps (one of which was to sift the flour into a separate bowl - uuuh extra dishes anyone?). So here I am going to condense all these steps into a more manageable and easy to read format.

The caramel I used was from a tin of condensed milk that I had boiled away (in the sealed tin!) for three hours rather than boiling sugar and cream etc for which you need a candy thermometer (which I don't). I boil up around three tins at a time and then keep them in the cupboard for when we need it.We also didn't happen to have any mascarpone in the fridge so I left that out too.

I think it is cake time.

Individual Banana Cakes with Caramel and Vanilla Bean Cream Cheese Icing
Adapted from Treats from and Little and Friday
Makes 8

125g butter, softened
3/4 cup caster sugar
2 large eggs
5 very ripe bananas, mashed
2 cups flour
1 teaspoon baking powder
1 teaspoon baking soda
4 tablespoons hot milk

Cream cheese icing:
30g butter, softened
50g cream cheese
3 cups icing sugar
1/2 teaspoon vanilla bean paste (or one teaspoon vanilla essence)

Preheat the oven to 160 degrees on bake. Line a texas sized muffin tin with baking paper. Cut a circle for the bottom then a long strip around 25cm long and 10cm wide and place that around the edges of the tins. Make sure the strip is long enough to overlap at the ends when in the tin. It will stand up in a tall cylinder but as you place the cake batter into it it will stretch out and line the edges of the tin exactly.


Cream together the butter and sugar until light and fluffy. Beat in the eggs one at a time then continue to beat until fluffy and voluminous.

Beat in the mashed banana.

Dissolve the baking soda in the hot milk.

Gently fold in the milk and sieved flour and baking soda in three equal lots.

Divide the mixture evenly between the tins. If you want really tall cakes then you may only get 6 but the shorter ones may be better if you or your guests aren't very good at tackling huge quantities of sickly sweet food.

Bake for 25-30 minutes or until a skewer comes out clean. Leave to cool before removing from tins and removing baking paper.


To make the cream cheese icing, cream together all the ingredients until light and fluffy.

To assemble the cakes, cut the cakes in half horizontally. You may need to level the tops of the cakes if they have domed substantially. Spread around two teaspoons of caramel over the base of the cakes then follow with a good dollop of the cream cheese icing. To the top layers, spread over the cream cheese icing followed by a small drop of caramel. Place the top halves onto their matching bottoms. Garnish with a slice or two of banana or some banana chips if you wish.


Enjoy! :)


Lemon Blueberry Sour Cream Cake

Also known as the best summer fruit based cake known to mankind.


Today was one of those crazy baking days where you just seem to make one thing after the other.

Jack and his friend Will wanted banana cake. So I made banana cake.

Then my friend Ashleigh came around with a box full of blueberries. So we made this blueberry cake.

Then I felt like sending Jamal something in Dunedin. So I baked a brownie.

Then before you knew it I was getting everything out to start cooking dinner.


Anyway Back to the blueberry cake.

Ashleigh took a trip to the Coromandel and on her way stopped off in Ngatea to pick some blueberries. I have decided that another trip to Ngatea needs to be made as they were the best blueberries I had ever tasted and better still they were only $9 a kg. Brill!

I saw a recipe in my Julie Le Clerc Favourite Cakes book for a frosted lemon blueberry slab cake. I'm not a fan of slab cakes, they never look as pretty as a nice circle, so we decided to use a 23cm circular tin instead. You don't want too small a tin as the blueberries sink which would leave you with a massive layer of plain cake over the top of the blueberries.


I feel like the blueberries could also be substituted for raspberries if you happened to have those in the fridge. What I think makes this cake great is the lemony tang of the lemon is softened with the delicate flavour of the blueberries.

The sour cream also makes it delicious and moist. The sourness counteracts all the sugar making it less sickly sweet.

Then you add delicious, whipped and luscious lemony icing to the top.


Just make this cake ok. It is so great. I know I say that about a lot of cakes but this is different. It is Summery. It isn't chocolatey and heavy but light, airy and fruity. And since fruit is good for us, especially blueberries, it is basically calorie free.

But as we all know, calories don't even count between December and February.

True story.


Did I mention this was super easy to make?

Ok I'll stop blabbing now and get straight to the important bit.


Lemon Blueberry Sour Cream Cake
Adapted from Julie Le Clerc's Favourite Cakes
Makes a 23cm diameter cake

125g butter, softened
3/4 cup caster sugar
2 eggs
1/2 cup sour cream
1 1/2 cups self raising flour
Zest of 1 lemon
1 1/2 cup blueberries (fresh or thawed frozen ones)

Lemon icing:
30g butter, softened
2 cups icing sugar
Juice of 1 1/2 lemons

Preheat the oven to 180 degrees on bake.

Cream together the butter and sugar until light and fluffy.

Add the eggs in one at a time, beating well between each addition. Beat until fluffy and voluminous.

Mix in sour cream and lemon zest.

Sieve in the flour and gently fold in until just combined.

Add the blueberries and delicately mix in.


Transfer into a lined cake tin (preferably one with a removable base) and bake for 35-40 minutes or until the top turns golden and a skewer comes out clean. I found that the top of the cake browned quickly so to stop over browning I placed a piece of tin foil over the top.


Leave to cool for half an hour before removing from the tin and transferring to a cake rack. Leave to cool completely before icing.


To make the icing, beat all the icing ingredients together until smooth and fluffy. You may need more icing sugar or lemon juice depending on the resultant consistency.

Garnish with strips of lemon zest if you wish.


Enjoy with a nice glass of iced tea (we did!)


Caramel Oat Bars

With emphasis on the caramel.


Imagine you are a slice living in my house. Your main goal in life as a slice is to be eaten but more importantly is to win the affection of me, Sophie so I will make you over and over again. How does a slice win my affections? Well the same way anyone does; with chocolate, caramel and enough sugar to turn a health freak into a diabetic in one bite.

This slice is a winner, no doubt about that. Sure the others I have posted about have the chocolate and the sugar aspects and are delicious but few slices can compare to one that is layered and within those layers lies a gooey caramel centre.


In the flurry of all these new slices that Mum and I have been finding recipes for I forgot about my old favourite, my turn to, my staple to impress. I am blaming my Christmas bakewell and birdseed slice for this.

Rewind back to last January and I was making this caramel oaty slice as well as my lemon krummeltorte slice at least once a week to take to friends places or as thank yous to people for letting me stay at their houses over the holidays.


I made this slice for my brother to take as a thank you for his friend Drew's parents for letting him stay a couple of nights in Tairua with them. It was this or the brownie and I was not in the mood to battle with sticky chocolatey brownie mixture.

Its pretty easy, in fact it is very difficult to get wrong unless you burn it (ok which I sort of did) or burn the caramel.


Don't let me fool you, this isn't fiddly, candy thermometer requiring caramel. This is can of condensed milk + butter + golden syrup + saucepan caramel. Easy as. Unless your tin of condensed milk decides it wants to be far runnier than usual leaving you confused and wondering whether or not it will thicken to produce a delicious caramel.

Perseverance and sheer laziness to go down to the shops and buy a new tin paid off. The caramel thickened and the day was saved.

This slice requires three components; the oath base, the caramel filling and the coconut topping.

Usually when I see things that have components I flick the page and look for something less ingredient hungry.

But this slice is different. And well worth it.

I chose to cook my base slightly longer than it says too, this made it really nice and crunchy. If you are into more cakey slices with a softer base then only cook it for ten minutes. The end result is still delicious.


Caramel Oat Bars
Source of this glorious creation completely unknown
Makes a thin 20x30cm slice

Base:
100g butter, softened
1/2 cup sugar
1 teaspoon vanilla
1 cup flour
1/2 cup desiccated coconut
1/2 cup rolled oats

Caramel:
395g tin of full fat, full sugar condensed milk
50g butter
2 tablespoons golden syrup

Topping:
1 cup threaded coconut
1/2 cup rolled oats
50g butter
1 tablespoon golden syrup

Preheat the oven to 180 degrees on bake and line a 20x30cm (or smaller) baking tin with baking paper.

Cream together the butter, sugar and vanilla until light and fluffy. Sieve in the flour the mix then add in the oats and the coconut.

Press firmly into the base of the lined tin and then bake for 10 (soft) to 15 (crunchier) minutes. Once baked, remove to cool while you make the caramel.


Place all the caramel ingredients into a saucepan and stir over a low to medium heat until the contents has turned a dark golden colour and has thickened. This should take 3 - 5 minutes.


Spread the caramel over the base.


To make the topping, place the butter and golden syrup in a saucepan and melt together. Add in the coconut and oats and stir until well coated.

Sprinkle the topping over the caramel and base.


Bake in the oven for a further 10-15 minutes or until the topping has turned crisp and golden in colour.


Once cold, cut into bars or squares.


Enjoy!


Orange and Almond Baby Bundts

Hi there!

This is really just a quick update that deleted itself whilst I was writing it on my way back home from a day at the beach.


After my very successful lemon baby bundt cakes I decided to try another flavour. I saw a orange and almond version on a website somewhere but the actual recipe itself was much larger than my Nigella one which would have posed an issue for my already very full six bundt pans.


I decided to just use the Nigella recipe is my last post and instead of using lemon zest and juice I used orange zest and juice as well as a couple of drops of almond essence.


I love almond essence. It is a very strong and potent one so don't use it as you would vanilla because it can taste very over powering very quickly. Quite literally a few drops will do. Almond essence reminds me of Christmas cake; the best cake of all. The best part of the cake of course is the almond icing that goes atop of this marvellous cake. We have just finished our Christmas cake (it didn't get iced until New Years eve) and I already miss the wonderful almondyness that it had.


So for those of you who also pine after the delicious aroma of almond flavoured things then definitely go ahead and add the essence. For those of you who cut off the icing of a Christmas cake (God have mercy on your soul) then leave it out, it is still just as delicious without.


Once again this is the easiest cake recipe you will ever make. No beaters required. So great.

Unfortunately I was running off to my friends house for dinner (hence why I made these cakes) so I don't have any pretty pictures, just one I took whilst I ran down the stairs by the side of our house.


Orange and Almond Baby Bundts
Adapted from Nigella Lawson's How to be a Domestic Goddess
Makes six little cakes

125ml (1/2 cup) plain unsweetened yoghurt
75g butter, melted
2 large eggs
zest of one orange
1/8 teaspoon almond essence
150g (1 1/4 cups) Plain flour
125g (1/2 cup) caster sugar
1/2 teaspoon baking soda
pinch of salt

For the icing:
1 1/2 cups icing sugar, sieved
juice of half to one orange
1 teaspoon of butter, melted
2 drops almond essence


Preheat the oven to 170 degrees and grease and flour the baby bundt tins.

Sieve together the flour, sugar, baking soda, salt and zest.

In a separate jug or bowl, whisk together the melted butter, eggs, essence and yoghurt.

Add the wet ingredients to the dry ingredients and gently mix until no more flour clumps can be seen. Try not to overmix as this will result in a dense and chewy cake.

Fill the tins until just below the top of the centre tube (the inverse of the bundt hole), sprinkle over a little white sugar and bake for 20-25 minutes until a skewer comes out clean or and cakes bounce back when touched.

Leave to cool a little before removing the cakes form their tins. Soft, freshly baked cake is delicate and if the cakes are too hot when they are removed they can fall apart. Also don't leave them to fully cool in the tins as this can result in them sticking to the tins.

leave to cool completely on a wire rack before icing.

To make the icing, use as much of the orange juice as necessary to make a thick but still drippable mixture. If it is too runny the icing will just run off the cake and only the bench creating a very sticky mess to wipe up later.

Decorate the cakes with a few long strands of orange zest if you wish!


I think these were better that the lemon cakes!
Enjoy!!

Baby Lemon Bundt Cakes

I found the best ever score at Pak n Save yesterday. Mini bundt tins with a gorgeous pattern to them and at only $7.99 for a pack of three. I bought six. Best purchase ever. I don't know how I am going to get all my new tins and books back down to Dunedin. It is gonna be a heavy ride. Who needs shoes and a hair drier when you have cake tins and cookbooks? I swear half of my luggage allowance is dedicated to bakeware.


Anyway, my good friend Cara bought me Nigella's How to be a Domestic Goddess for Christmas. It was an essential book and I just had to have it! What I love about this book is the way she writes. It isn't a sterile cookbook. She puts the time and effort into explaining things and reassuring you that the products of your adventures in the kitchen don't always turn out perfect and that's ok. She even points out the flaws in the pictures features, like chunks of cake missing as they stuck to the tin. The introduction is highly amusing and well worth the read. It is probably the best written cookbook I have come across. Each recipe has its own well thought out blurb recalling where the recipe came from, misadventures she may have had when making it as well as a few useful tips.


You should get it.

I had seen the mini bundt tins a few weeks ago but I withheld the purchasing of them, convincing myself that I didn't need them. Whilst flicking through Nigella I found a recipe where she used the mini tins. I was sold! So off to Pak n Save I dashed and immediately purchased the tins!


It wasn't until I was scooping the batter into the tins this morning that I realised that one of the tins was missing and had been left behind on the shelf. Ooops! So while I only made five mini cakes today I recommend making six as they kind of overflowed a bit and were a bit larger than I had hoped. Luckily I went back this afternoon and explained what had happened and the lost tin was reunited with its brothers in my kitchen drawer.


I actually made these little cakes for my brother to take two of them on a romantic sunset picnic with his thing/girlfriend (I have no idea of their official status!) this evening. I am also making Jack some mini bacon and egg pies to also take.

He owes me one.


Anyway I went to go and weigh out the ingredients when I discovered that our electric kitchen scales were deciding to have another crazy day and refused to weigh anything properly (they don't sit on a final value). I tried banging them against the bench, taking out the batteries but alas! I was just going to wait this one out. They will sort themselves out eventually. It always happens when I plan on getting up early to bake something.


I ended up having to google the weight to cup conversion for all the ingredients. Luckily it was only the flour and sugar that needed converting (the butter was from a new pack for I could estimate using the guidelines).

I'll give you both values below just in case you don't have decent kitchen scales (which you should have!!).

This recipe is so easy to make. You don't need a beater, just a spoon. There is no creaming of the butter and sugar involved, just mixing.

So great.

If you don't have mini bundt tins you could try mini loaf tins and I guess muffin tins as a last resort. Try serving the muffin versions with the icing on the bottom side of the cake (as in turn the muffins upside down to serve). It makes them slightly more interesting to look at.


I also sprinkled a bit of sugar over the top of the batter just before they went in. This gave them a lovely crunchy base which I think is great.


Baby Lemon Bundts
Adapted from Nigella Lawson's How to be a Domestic Goddess
Makes six little cakes

125ml (1/2 cup) plain unsweetened yoghurt
75g butter, melted
2 large eggs
zest of one lemon
150g (1 1/4 cups) Plain flour
125g (1/2 cup) caster sugar
1/2 teaspoon baking soda
pinch of salt

For the icing:
1 1/2 cups icing sugar, sieved
juice of one lemon
1 teaspoon of butter, melted


Preheat the oven to 170 degrees and grease and flour the baby bundt tins.

Sieve together the flour, sugar, baking soda, salt and lemon zest.

In a separate jug or bowl, whisk together the melted butter, eggs and yoghurt.

Add the wet ingredients to the dry ingredients and gently mix until no more flour clumps can be seen. Try not to overmix as this will result in a dense and chewy cake.

Fill the tins until just below the top of the centre tube (the inverse of the bundt hole), sprinkle over a little white sugar and bake for 20-25 minutes until a skewer comes out clean or and cakes bounce back when touched.

Leave to cool a little before removing the cakes form their tins. Soft, freshly baked cake is delicate and if the cakes are too hot when they are removed they can fall apart. Also don't leave them to fully cool in the tins as this can result in them sticking to the tins.

leave to cool completely on a wire rack before icing.

To make the icing, use as much of the lemon juice as necessary to make a thick but still drippable mixture. If it is too runny the icing will just run off the cake and only the bench creating a very sticky mess to wipe up later.

Decorate the cakes with a few long strands of lemon zest if you wish (I would have done this but my lemons were ugly and speckled).


Nigella says you can vary this recipe by using limes or oranges instead of the lemons. I think I might have to give them a go. This would also work really well as a syrup cake recipe. Instead of making the icing, make up a lemon syrup with say half a cup of caster sugar, the juice of a lemon and a splash of water. Simmer in a saucepan until a syrupy consistency is reached then pour the hot syrup over the cold cakes.

Enjoy!!


Black Doris Plum Syrup Cake

Sometimes baking really does make you feel better.


Today I was in one of those womanly funks that just wouldn't go away. I tried supermarket shopping, flicking through my cookbooks and I even bought a new tart tin but nothing would rid me of this bluesy feeling. 

I used this mood as an excuse to bake a cake without my mother raging at me for a) making us all fat and b) costing her the earth in ingredients. 


Recommended to me today by a family friend (as we both sat there and got our hair dids) was Julie Le Clerc's black Doris plum syrup cake from her book Favourite Cakes. It sure did look marvellous in its juicy and sticky wonder spread across the page. What attracted me most to this cake was the beautiful fluted bundt pan that it was cooked in making the most amazing pattern on the outer surface of the cooked cake. I traipsed through Mum's baking pan drawer and found one that almost equated the beauty of Julie's pan. Unfortunately our pan was a few centimetres too big for the recipe stated. I also was unable to find a 410g tin of black Doris plums, only a 820g tin. Alas!

Wanna know what I did?

I made a bigger cake.

I know they say that we shouldn't play around and that we should always use the tins specified blah blah blah. But you know what? I don't happen to have every single tin in every single size, I wish I did and I sure am close but not close enough. 


I decided to increase the recipe by a quarter. The only exception to this rule was the tin of plums, I went right ahead and used the whole 820g tin. There were just enough to do two rings of them in this cake. I also used all of the tin's juice for the syrup; you can never have too much syrup. Ok you can. Never mind. 

Below i'll give you the exact proportions that I used for my 25cm diameter bunt pan. It filled the pan almost to the top so if you do infact have a smaller pan, reduce the ingredients by a fifth and you should be sweet.


Black Doris Plum Syrup Cake
Adapted from Julie Le Clerc's Favourite Cakes 
Makes one large bundt cake (25cm)

1x 820g tin black Doris plums in syrup
230g butter, softened
1 1/2 cups caster sugar
5 eggs
1 teaspoon vanilla essence
1 1/4 cups plain, unsweetened yoghurt
2 1/2 cups plain flour
1/2 + 1/8 teaspoons baking soda

Plum Syrup:
left over juice from plum tin
juice of 2 lemons
1/2 cup white sugar


Preheat the oven to 180 degrees on bake.

Drain the plums, reserve and strain the juice. Cut plums in half and remove the stones from each one. 


Grease your bundt pan and dust it with flour. 


Cream together the butter and sugar until light and fluffy. 

Add the eggs one at a time and beat until incorporated and the final volume has almost doubled. 

Stir in the yoghurt.

Sift in the flour and baking powder and mix until homogenous. Make sure you use a scraper to get down at the mixture at the bottom of the bowl. 

Spoon one third of the mixture into the base of the bundt tin. dot about six or seven plum halves over the top of the mixture. Spoon the next third of the mixture over the top of the plums. Place the next lot of plums over the batter. Spoon the remaining batter over the last lot of plums. Use a spoon to flatten the mixture in the tin.


Bake for 55 minutes or until a skewer or butter knife comes out clean. 


Leave the cake to cool for half an hour before turning out onto a cake rack. To remove from the tin, run a knife around the cakes edges, and sort of shake the pan to loosen it. Even gently bang it against the bench.


Leave to cool completely before pouring over the syrup. Remember the rule: Cold cake and hot syrup or hot cake and cold syrup.

While you are waiting for the cake to fully cool make the syrup by placing all the ingredients in a saucepan and simmering until the syrup becomes thick and well, syrupy. This could take up to 10 minutes of strong simmering. 


In this hot weather you are going to want to keep this cake in the fridge.

Serve with a nice dollop of plain yoghurt (we used mascarpone but I think yoghurt would be much better) and enjoy!


Ripe's Rocky Richmond Road Slice

Summer is the season for slices.

Slices are the perfect picnic treat. They can be packed up in plastic containers and safely make their journey to a favourite picnic spot. In my family that picnic spot is anywhere that has sand (much to the annoyance of Dad) and an ocean.


Slices are durable and sharable. They don't need fancy plates, forks or accompaniments, just fingers and a mouth.

We often make up slices and pop most of them in the freezer so that the next time we head off for a day at the beach we can put out a slab, chop a bit off and go.

In the case of this slice, half went into the freezer and the other half I took on up to Nana's for morning tea :).


The one problem with Summer is the heat. Most slices have butter in them which means as the temperature rises they start to become soft and sometimes even melted. Unfortunately with this slice, it needs to be transported in the presence of a couple of ice packs. Then again, how many of us go to the beach without ice packs in our chilly bags/bins anyway.


This recipe comes from the Ripe Recipes book by Angela Redfern. It contains all the recipes for the delicious treats that can be found at the Ripe Deli on Richmond Road (hence why this is called Richmond rocky road slice) in Auckland. Out of all Mum's recipe books, this is the one that she has used the most and made the most things out of. Every week or so there is a new surprise coming out of the kitchen which had its origins in this book.

This isn't your typical rocky road, it is more of a fridge set biscuit slice. Actually, it is a biscuit fridge set slice. The only point of difference is the presence of malt biscuits and marshmallows. It doesn't involve actual chocolate either, just cocoa, butter and sugar which makes it a cheaper option that the traditional chocolate laden rocky roads out there.

This is great if you have some built up tension that needs to be worked out as you get to bash the crap out of a poor little bag of biscuits with a rolling pin. Make sure the bag is double lined or else it might split, resulting in more stress and a whole lotta mess!


Rocky Richmond Road Slice
Adapted form the Ripe Recipe's cookbook by Angela Redfern

250g malt biscuits, crushed
250g super wine or arrowroot biscuits, crushed
250g marshmallows, roughly chopped
200g butter
1 cup caster sugar
3 tablespoons cocoa
3 large eggs, lightly beaten

icing:
1 1/2 cups icing sugar, sifted
2 tablespoons cocoa, sifted
50g butter, meted
2 tablespoons lemon juice
1/2 cup threaded coconut


In a saucepan, melt together the butter, caster sugar and cocoa until smooth. Add the lightly beaten eggs whilst stirring briskly and cook for 5 minutes, stirring constantly. Turn off the heat and leave to cool for 10 minutes.


Meanwhile, crush the biscuits in a large snap lock bag or a double lined plastic shopping bag using a rolling pin. Crush until the average fragment size is around 2cm or less.


Mix the crushed biscuits in with the chopped marshmallows.


Line a 20x30cm baking tin with baking paper.

Pour the liquid mixture into the bowl of biscuits and marshmallows and stir until evenly combined.


Using damp hands, press the mixture into the prepared tin.


Refrigerate the slice for two hours before icing.

To make the icing, mix the ingredients (minus the coconut) together using a bit of hot water to loosen the mixture until it is pourable but still thick.

Spread the icing over the slice then sprinkle over the coconut.


Return to the fridge for another hour or so before slicing.


Enjoy at your next beach picnic!


Christmas Cupcakes

Happy Christmas Eve!!

Ooh so exciting!

In the Edmond's house Christmas is dictated by tradition.

Each year Jack and I get a new Christmas decoration to hang on the tree. However in order to decorate the tree the whole family must be together and Christmas with Bing MUST be playing.

But the best traditions are the ones kept for the big day itself.


Even though Jack and I are 18 and 20 we still get our Christmas stockings filled with treats. Unfortunately due to our more nocturnal sleeping patterns they do not magically appear at the foot of our beds during the night and instead are found outside our doors.

For as long as I can remember both Jack and I ignore our primal urges to sleep in and wake up at the crack of dawn. Whoever wakes up first has to run into the other's room and jump on their bed and say 'Santas been, Santas been!'.


Then we sit there on our beds going through our stockings and begin the munching on treats. Funnily enough the oranges, which we get every year without fail, are eaten last.

Then at about 6.50am we creep downstairs and put the kettle on. You see our Mum and Dad have some rules: no waking them up before 7 and in order to enter their room we must bring with us two cups of tea before we can show them what Santa brought us.

We grab their stockings (yes Mum and Dad get stockings too) and the tea and bound into their room. We all sit on their bed whilst we show them the night's loot. Then they go through theirs and without fail Mum's annual stash of macadamia nuts is opened. Something that isn't opened is Dad's jar of gherkins.


There is a funny story about these gherkins. Apparently when Dad was a kid, each of his siblings got a type of preserved produce like prunes, picked onions or in Dad's case, gherkins. I can't remember what the fourth item was.

So back in 2001 as a 9 year old, I relabelled the jar. Mum and Dad thought it was so hilarious that a new jar has never been purchased. Last Christmas we celebrated its 10th birthday. So once Dad pulls them out of his stocking, they return to the pantry for another year.


In order to go and open the presents under the tree we must then bring Mum and Dad a second cup of tea each. Once that happens everyone takes their place in the lounge around the tree.

Dad sits by the tree. He is the official present hander outer. Mum is always on the couch opposite the tree with Jack sitting beside her. I am on the couch beside the tree. I am the present assistant.

One by one Dad hands out the presents and we all watch while the present receiver opens their gift. This process lasts around 40 minutes. The older we get the less presents there are to open so we try and make them last.

The best presents are always the ones where we surprise Dad. Two Christmases ago Mum and I surprised Dad with an iPad. We wrapped it up in a huge apple (as in the actual fruit) box to try and trick him. When he got through the layers and then came to the small iPad shaped box he stopped in his tracks. He just stared at all of us in absolute disbelief. A few tears came out of his eyes. It was kind of hilarious to see someone so stoked with a gift.

I think the best present I ever got other than my Baby Born doll, Rosie, was my handmade recipe book that Mum had made for me. It is hand bound and made of hand made paper. It was given to be the Christmas before I left for Otago. Before then Mum and I shared with messy ring bound exercise book which had all our favourite recipes written and glued into it. She realised that upon my departure there would be a custody dispute over it. So she took some of the pictures from it, copied them and this lady incorporated them into the design. It was the best thing ever.


This book is filled with special recipe like my Nana's Christmas cake recipe which I got her to hand write.

I think Christmas cake is one of the best foods at Christmas time. Forget mince pies, ham and scorched almonds. The cake is where it's at. Of course it needs to be covered in the white and almond icing.


I found this recipe in the Christmas section of my Hummingbird Cake Days book. It uses fruit cake fruit, a nice dosing of the festive alcohol of your fancy and some delicious almond flavoured icing.

This recipe said to use rum to soak the fruit in. Unfortunately (very unfortunately) we did not have rum in the house hold and I thought Mum's stash of gin wouldn't be quite the same. Nana's cake recipe always uses sherry or brandy so I decided to substitute the rum for sherry to give it a more Edmond's family twist.


I also thing fruit cakes should be nice and dense with fruit so I used more fruit that it said. I also added a few more Christmas cakey spices and flavours such as almond and a bit of brandy essence.

Mum thinks these are better the day after you make them as they don't dry out like normal cupcakes. Try making the cake the day before you need them but ice them on the day.


I also didn't have any dark brown sugar, only normal lightly coloured stuff. This made the cakes not as rich in colour as I would have liked but they still tasted amazing.


Christmas Cupcakes
Adapted from the Hummingbird Bakery's Cake Days book 
Makes 22

400g dried mixed fruit
100 ml rum/brandy/sherry
200g softened butter
200g soft dark brown sugar
4 large eggs
160g plain flour
1/2 teaspoon baking powder
1/4 teaspoon ground nutmeg
1/4 teaspoon ground cinnamon
1/4 teaspoon allspice
1/4 teaspoon ground ginger
60g ground almonds
1 teaspoon almond essence
1 teaspoon vanilla essence
a few drops of brandy essence

For the icing:
500g icing sugar
100g softened butter
50ml whole milk
1/2 teaspoon almond essence


First soak the dried fruit in the rum/sherry/brandy for 30 minutes or overnight (overnight would be best).

Preheat the oven to 190 degrees on bake.

Cream together the butter and sugar until pale brown and fluffy. Add the eggs one at a time and beat well between each addition. Beat until very fluffy. Add the essences. If the mixture looks like it is about to split, throw in a  few tablespoons of flour to help stabilise it.

Sift together the flour, baking powder and spices then add to the egg, butter and sugar mix. Mix until combined.

Add in the ground almonds and then the fruit and rum mix. The mixture will be quite sloppy.

Transfer some of the mixture into a pouring jug and fill a muffin tin lined with cupcake cases until each case is two thirds full.

Bake for 20 minutes or until a skewer comes out clean or the sponge bounces back when pressed.

Once cooked, transfer to a wire rack to cool completely.

Once fully cooled, cream together the icing ingredients until light and fluffy. More milk or icing sugar might need to be added. Make sure you sift the icing sugar especially if you plan on piping the icing on.

decorate with some festive sprinkles and enjoy!


Merry Christmas!

Enjoy x