Nutella Cheesecake

Before this cheesecake I was a cheesecake virgin.


Ok half a virgin (my previous attempt at age 15 had failed miserably so I refuse to acknowledge it).

I have always been scared of cheesecake.

It always seemed too fiddly, folding whipped cream or using gelatine. It just seemed to be a set up for failure.


I have also not been much of a cheesecake fan. My Mum doesn't like cheesecake so I guess out of the following in her footsteps and the constant seeking for approval complexes that I too do not like cheesecake (that much).


Anyway, back to the story of how this cheesecake came to be.

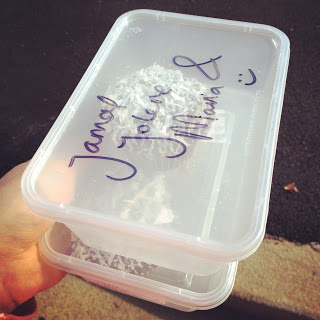
Remember my good friend Jamal? I made him this carrot cake last year for his 20th birthday. Exactly a year later (funny how birthdays are an annual thing) I am making him another cake. This year however I had promised him a cheesecake. He loves cheesecake.


So I prepared to get out of my comfort zone and overcome my fear of cheesecake for Jamal. Because he is worth it. I wasn't too sure what type to make, it wasn't allowed to contain gelatine so it either had to be baked or heavily cream cheese based.

I saw lots of links online to delicious looking masterpieces but I wanted something simple.

I consulted my hero. Nigella.

Trust Nigella to have a wickedly rich cheesecake recipe that was simple as to do. She is a legend.


I made a few adjustments based on my life rules:

1) You can never have too much nutella. So I added a wee bit more to the base.
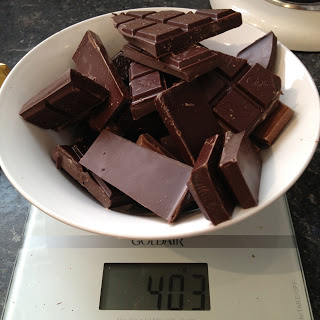
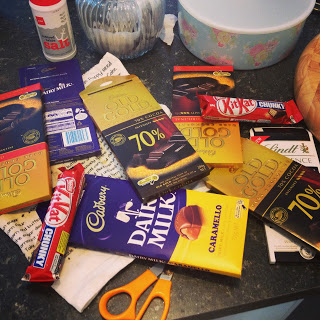
2) You can never have too much dark chocolate. So I melted some in.
3) Hazelnuts are good. So I put in two packets rather than the 100g required.


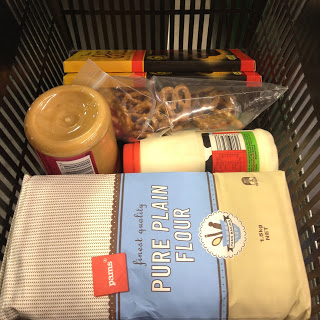
The only problem with adding more nutella is that you then require more than one jar. Ok to be honest I used Pams hazelnut spread because I am too poor for the real deal but it still worked. The good thing about Pams is that they have a 400g jar (which is what you need for the filling) and a 220g jar which is a perfect wee top up for all the spoonfuls that accidentally make their way into your mouth over the course of making this. So I recommend buying both. The worst part is that you have left over spread in the cupboard  . . .

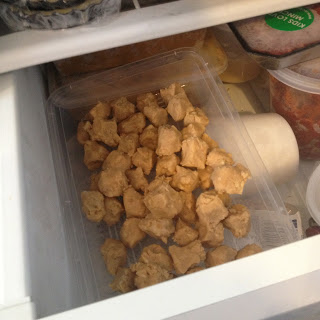
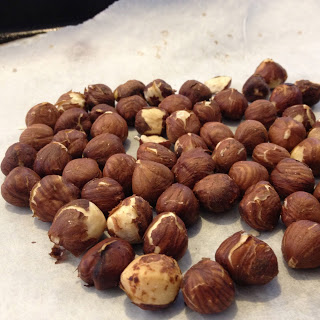
You will need to toast the hazelnuts. You do this buy baking the nuts for 10 minutes at 180 degrees on a piece of baking paper. You then transfer them to a clean tea towel and rub them between it to remove the skins. The skins are bitter and you don't want them in this magical dessert. The toasting also helps to enhance that wonderful hazelnutty aroma we all know and love. Just keep and eye on them and be careful not to burn them.

Also, the best thing about this is that you only need to leave it to set in the fridge.

The only problem with this is that you need to exert patience whilst waiting for it to set.
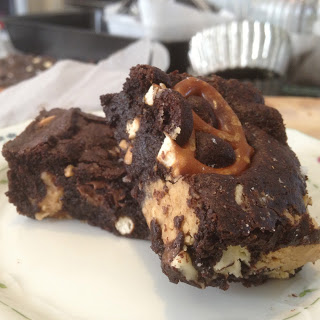
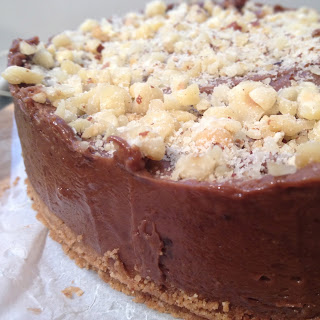
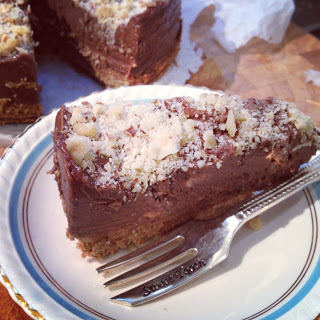
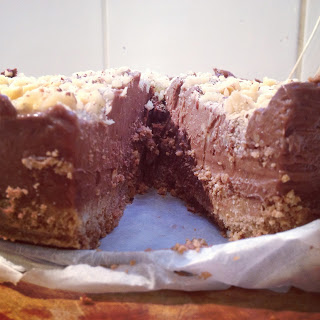
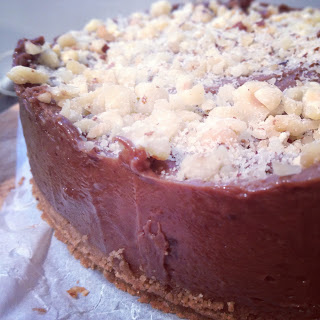
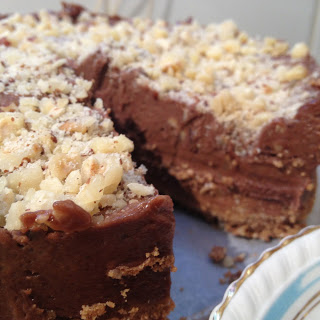
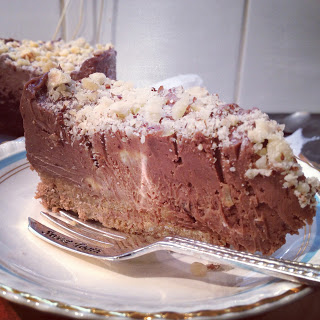
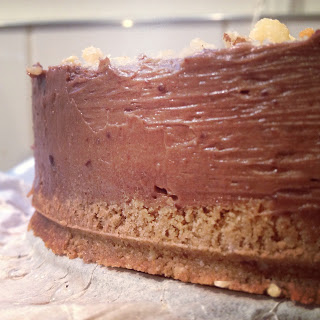

Nutella Cheesecake
Adapted from Nigella Lawson's recipe 

Makes 20cm cheesecake

Base:
250g (1 packet) digestive biscuits
75g butter, softened,
3 tablespoons nutella (from that small jar)
40g of toasted hazelnuts

Filling:
400g nutella
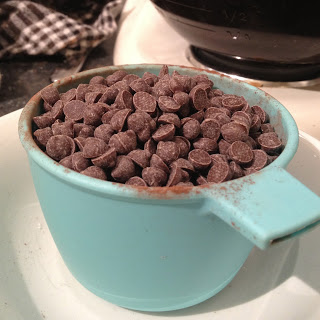
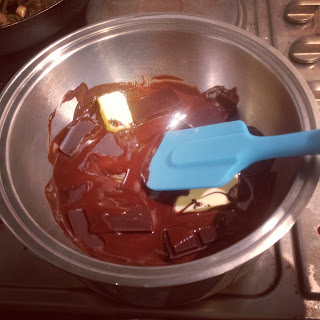
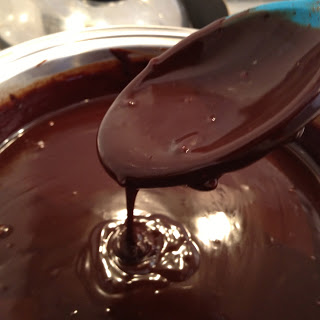
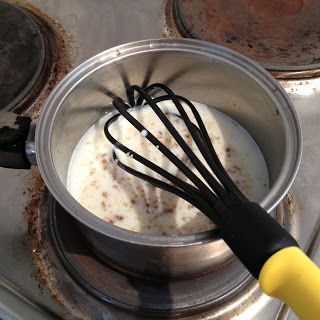
100g 75% + cocoa solids dark chocolate, melted either in a double boiler or carefully in the microwave
500g cream cheese (2 tubs), at room temperature
75g icing sugar, sieved
100g toasted hazelnuts, chopped


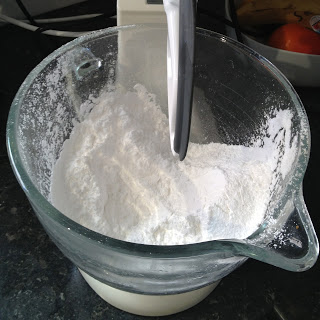
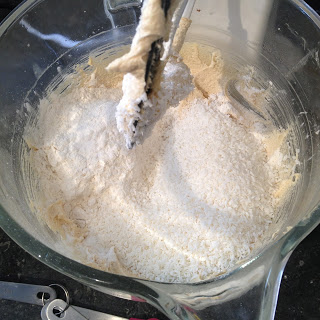
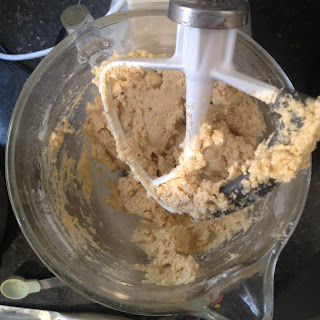
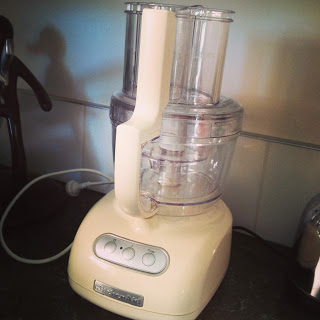
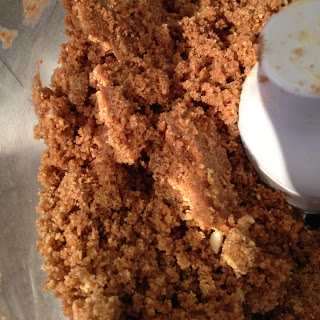
In a food processor, grind up the hazelnuts. Then add the digestive biscuits and blast until a coarse crumb. Add in the butter and nutella and pulse until evenly distributed.


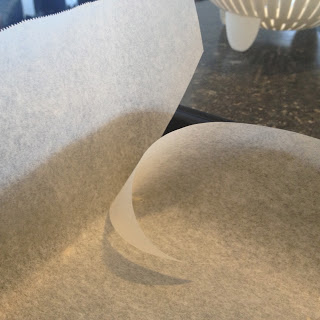
Line the base of a 20cm springform cake tin with baking paper (you trap a piece of baking paper in between the base and the outer ring). Grease the sides with butter.


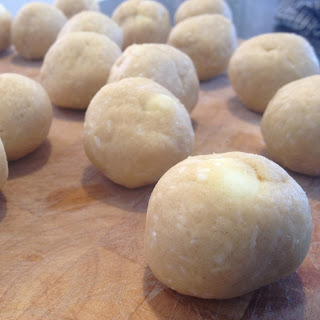
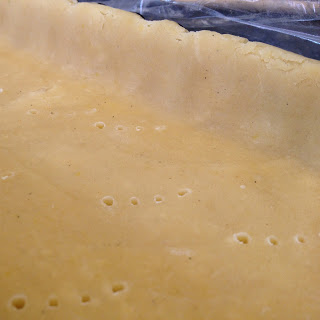
Press the base mixture firmly into the base of the tin and place in the freezer to chill whilst you make the filling.


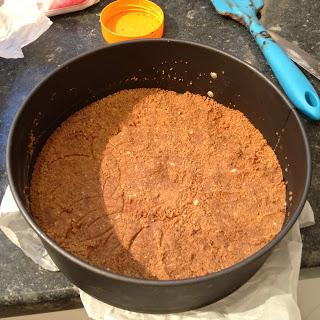
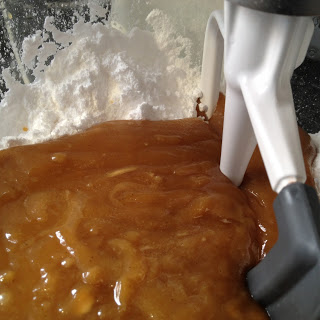
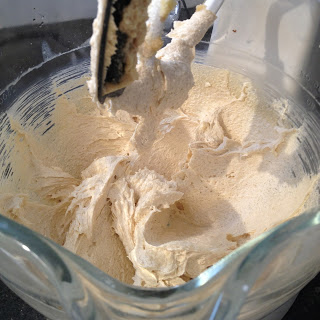
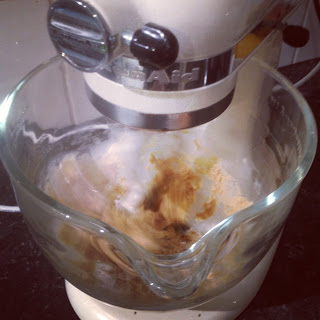
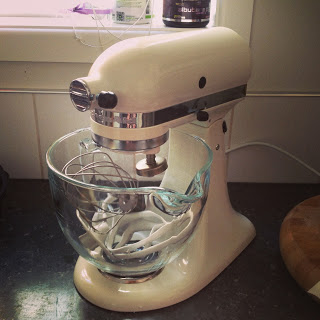
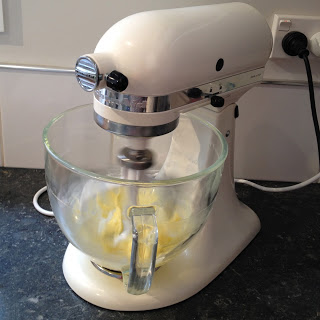
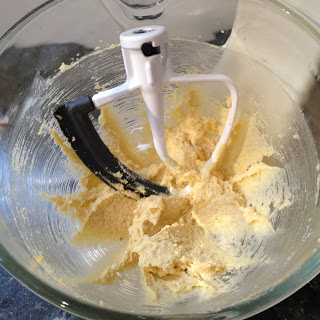
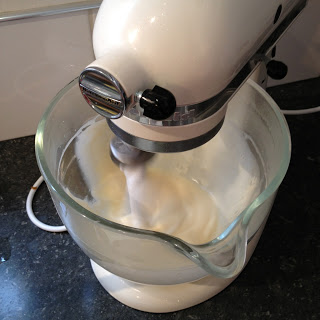
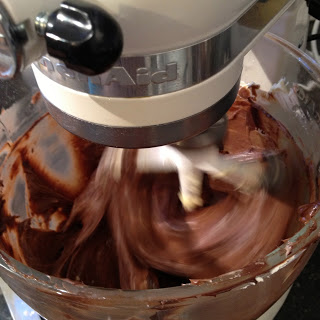
Cream together the cream cheese and icing sugar until aerated and light. Spoonful by spoonful add the nutella until it has all been added.


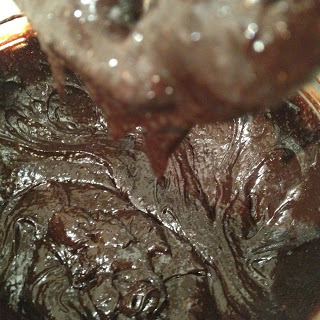
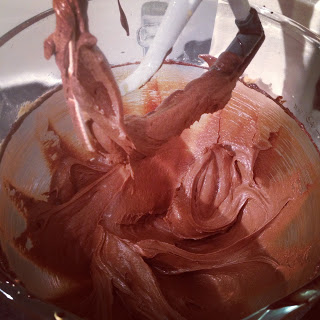
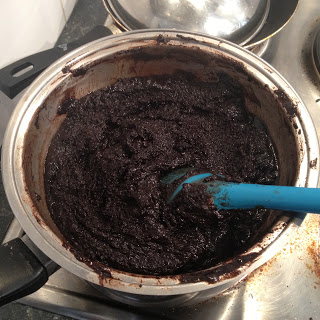
Very slowly add the melted chocolate whilst beating. If you add it all in at once you will melt the cream cheese.


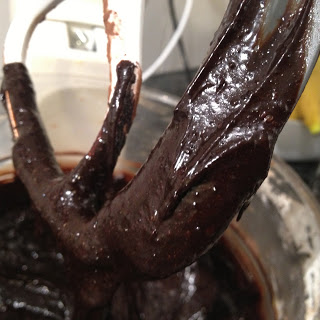
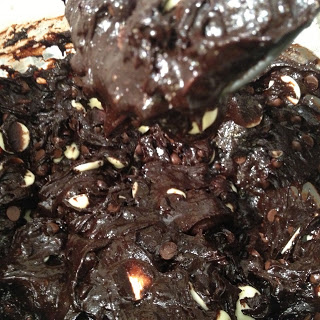
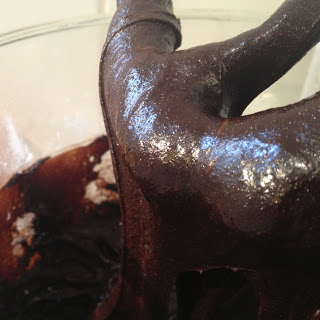
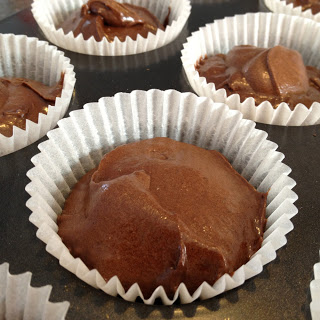
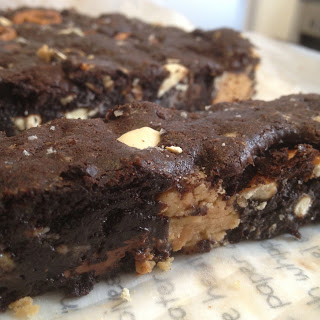
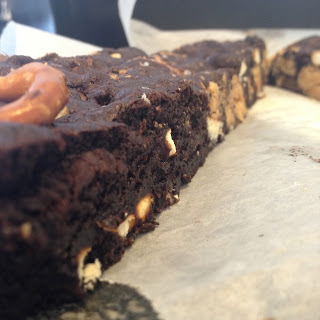
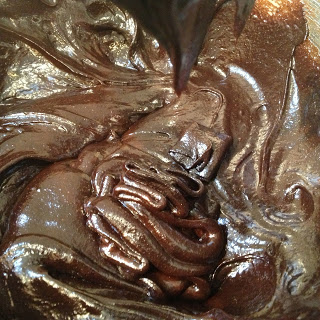
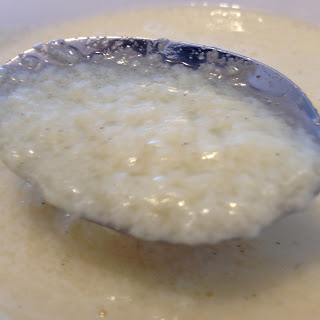
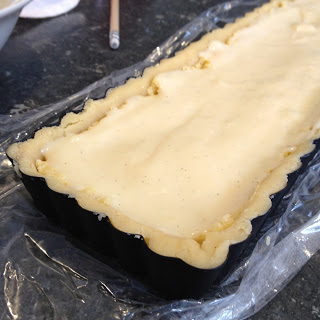
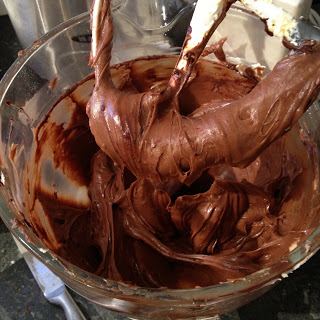
Gently mix it together until a dark, smooth mixture lies in front of you.


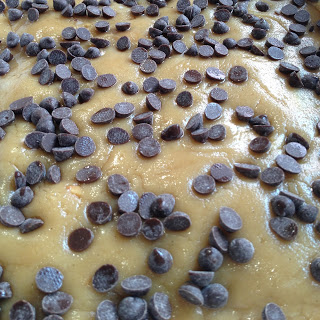
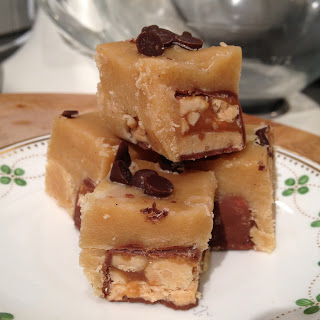
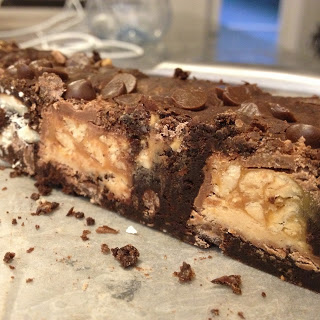
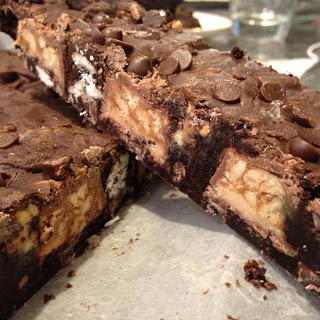
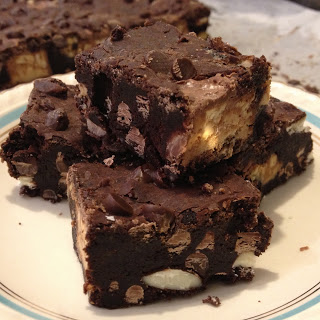
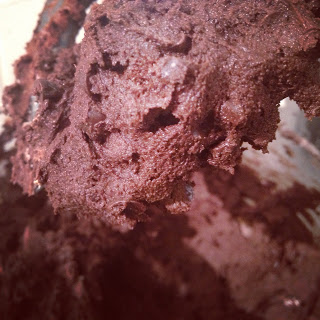
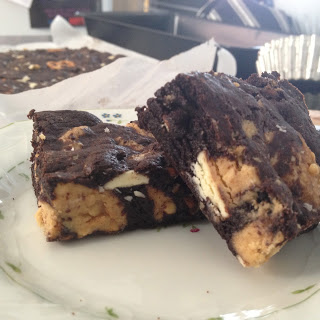
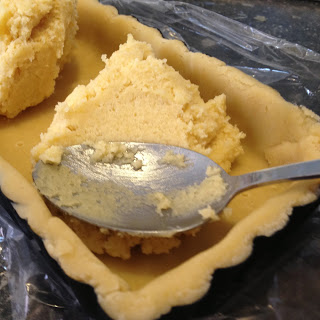
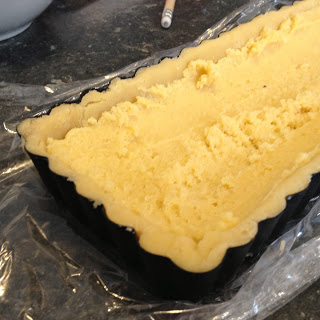
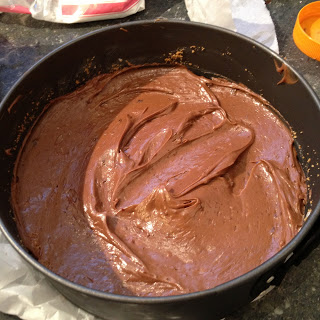
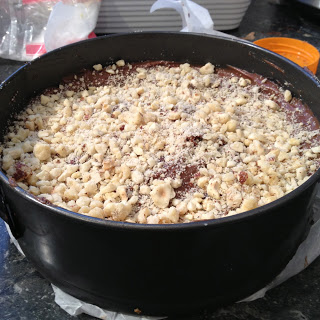
Place about a half cup of this filling mixture on the base of the cheesecake. Sprinkle a small handful of the chopped hazelnuts over this. Then pour over the rest of the filling. Scatter over the rest of the hazelnuts. Cover with cling film then leave to set in the fridge overnight.


To release this from the tin, carefully pour hot water over the sides of the tin. This should melt the very outer surface slightly. Then release the spring form lever and slide the cheesecake off the base.
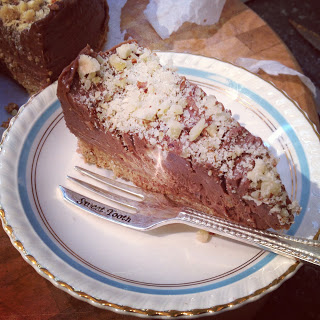
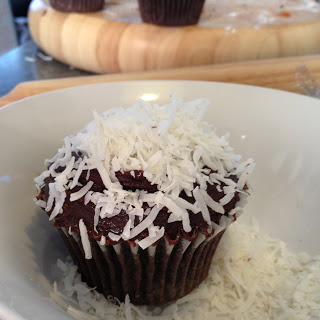
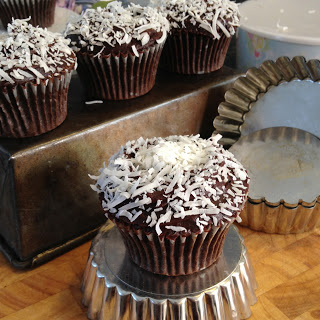


Enjoy!!!

Snickers Truffles

This excellent weather we are having today. By excellent I mean stormy and wild. The best kind of weather. None of this mellow sunny rubbish. I like my weather to have guts.


Funnily enough I made this fudge/truffle thing yesterday when it was boiling hot (well hot for Dunedin anyway) and beautiful sunshine. Today is a far better fudge consuming day.


I found this recipe for peanut butter fudge in the latest Donna Hay Magazine issue. It is a great issue, I can't wait to make more from it. It isn't a true fudge recipe really, it doesn't involve boiling up sugar or anything like that. It resembles the truffles I had to make for the pretzel peanut butter brownie I made a month or so ago. So I think I will call this a truffle slice rather than a fudge.


I made one small change in the recipe though.

The original didn't call for snickers bars.

Snickers bars make everything better.

Don't you agree? Ok they do unless you are allergic to peanuts.

Then they kind of ruin the party.


But anyway, I dotted 10 halved mini snickers bars along the bottom of the tray I used to set the fudge. The fridge makes them quite brittle and they kind of fell out of their fudge settings when you cut them into cubes. So I propose that next time to spread a thin layer of fudge down first then dot the half snickers bars then cover it with the rest of the truffle/fudge mix. This should hopefully contain the snickers bars a little better and prevent them from falling off.

This recipe is pretty difficult to screw up. Just make sure you sieve the icing sugar or else it will be lumpy. I used my stand mixer to mix it all together but a handheld beater or even a spoon and an enthusiastic arm would do the trick.


So. Lets do this.

Snickers Truffle Slice
adapted from Donna Hay Magazine issue 68 (April/May 2013)

150g butter, chopped
1/3 cup cream
390g smooth peanut butter
1 teaspoon vanilla extract
400g icing sugar, sifted
10 funsize snickers bars
chocolate chips for fun

Line a small slice tin (I used a small lasagne dish haha) with baking paper.

In a small saucepan, melt together the butter, peanut butter, cream and vanilla, stirring until smooth. In a large mixing bowl, sift your icing sugar.

Once the peanut butter mixture has become all nice and smooth pour it into the icing sugar and mix until evenly combined and smooth.


Cut all the snickers bars in half.


Spread about a third of the fudge mixture onto the bottom of the tin. Dot the snickers bar halves in a grid formation (4 x 5). Spoon over the rest of the mixture and smooth flat. Using a second sheet of baking paper, place it over the top and smooth the fudge really flat with your hands or a flat bottombed object.


Sprinkle with the chocolate chips and gently press them in.

Leave to set in the fridge for a couple of hours before slicing into squares.

Enjoy!


White Chocolate and Coconut Cookies

Hello all!


This is just a breather post. A non chocolate laden browniesque recipe to cleanse the palate. Ok well it is chocolate laden, but there is no dark chocolate, or snickers bar in sight! So it will do.

I feel like I need to be a bit more adventurous in my cookie baking. It is like there are only so many types you can make before you delve into what I call the 'nut-based' zone, where every other recipe contains an expensive ground nut base such as almond, or hazelnut.


I also feel that there are only so many sorts of chocolate bars bloggers can hide inside cookies before it becomes a bit crazy, a bit ott and just a bit gluttonous. I feel there are many baking blogs out there which aren't really baking blogs at all. Instead they are just methods for assembling pre-mix cakes with the confectionary isle's worth of chocolate bars into one heart attack and diabetic coma. The craft, skill and love lacks somewhat.

So maybe I will have to dive into those fancy looking almond based cookies after all.

So anyway whilst skulking the works of Donna Hay online for new recipes to try I found a recipe for coconut and white chocolate chunk cookies.

I love coconut.

I love white chocolate.

I love cookies.

We had a winner.

Although I have to say, the appearance of the final baked cookie looks nothing like the picture on her website. I wonder what happened. I wonder how she got them so excellent looking.

Regardless, they tasted excellent.

Ah, speaking of excellent, I managed to find a new cookie consumer. All my current cookie consumers (who receive snap lock bags full of cookies on a semi regular basis) are all on diets. Apparently Maxie wants his abs back. Boooo!!! But through sheer luck, my lack of social normalcy and a casual chat in the Link at uni I managed to find a new consumer. There is nothing better than gifting fresh baking to people who appreciate it. I get as much joy giving it away as I do making it, so if I can brighten someone else's day as well it is well worth it. Baking equals love folks.

I swapped the self raising flour here for an extra cup of plain plus a teaspoon of baking powder. I also added more white chocolate melts. Because you can never have too many of those.


Coconut and White Chocolate Cookies
adapted from Donna Hay
makes 25ish

125g butter, softened
3/4 cup white sugar
1/4 cup brown sugar
1 large egg
1 teaspoon vanilla essence
2 cups plain flour
1 teaspoon baking powder
150g white chocolate melts or white chocolate chopped into chunks
1 cup desiccated coconut

Cream together the butter and sugar until light and fluffy.

Beat in the egg and mix until voluminous. Mix in the vanilla.

Mix in the flour, baking powder and coconut.

Stir in the chocolate.

Roll into balls and use the palm of your hand to flatten them on the tray (lined with baking paper).

Bake at 180 for 12 minutes or until lightly golden brown.

Easy as that.


Enjoy!!


Snickers Bar Brownies

For the good of man kind I felt like I had to write this post.


It will be short, sharp but definitely not lacking in chocolately noms. In fact the sheer obscene quantity of chocolate in this brownie will compensate for the lack of words. Who needs words when you have chocolate?

(This is basically me procrastinating reading an article on the acidity of milk)

So I took another mindless trip to New World and ended up buying fun sized snickers bars, more dark chocolate and some Gaviscon. I don't know why. I just did. It was a bit silly considering I had purchased 1.6kg of chocolate for baking the day before. I think it was because it was only $1.99 a bar. Dam you strategic pricing. My baking excess supply store is looking a bit ridiculous.


So I found myself up rather late and feeling too lazy to go to bed (taking contact lenses out, brushing teeth and showering are all very strenuous activities I would have you know!) so I decided to make some brownie to take to my friend Max the next day. Yes. Logic. Baking brownies is far less effortful than sleeping . . .


So anyway the Snickers bar brownie was born. I got a bit carried away with the chocolate. I think 700g went into this. Fliiiip. Oh and I felt like the peanuts in the Snickers bars wern't enough so I buried spoonfuls of peanut butter in there too. YOLO.

Eww. Can't believe I just said that.


So the base for this brownie is from Butter Baking. I just switched around the inclusions to suit what I had. It is a good brownie base. I recommend having fun with it! So once again you can add really whatever you like to it. Whatever your inner fat kid desires.


Snickers Bar Brownie
Adapted from Butter Baking 
Makes 20x30 cm trays worth

225g butter
1 3/4 cup brown sugar
1 cup + 2 tablespoons cocoa
100g dark 70% chocolate
1 teaspoon vanilla
2 eggs
1 egg yolk
3/4 cup plain flour
3/4 cup dark chocolate chips
3/4 cup white chocolate chips/melts
12 funsize Snickers bars (212g worth)
1/3 cup crunchy peanut butter
more chocolate chips to sprinkle over the top


Preheat the oven to 170 on bake.

In a heatproof bowl over a sauce pan with a few centimetres of boiling water in it, melt together the chocolate and butter. Once melted add in the sugar and stir to dissolve. Remove the bowl from the heat and either transfer to a larger bowl or a stand mixer and beat in the cocoa and vanilla until smooth and lump free.

Beat in the eggs and the egg yolk one at a time until the mixture becomes really thick and luxurious.


Add in the flour and stir until just combined.

Stir in the chocolate chips both dark and white.


Line a 20x30cm baking tin with baking paper. Spread the brownie mixture into the tin.

Chop the fun size bars in half and place insert them in rows into the batter. So 4 half bars by 6 half bars.


Using a teaspoons, make small holes in the batter and fill them with small blobs of peanut butter.

Using a spatula, smooth some of the brownie batter over the tops of the snickers bars and peanut butter blobs so that they don't burn and everything is nicely sealed in.

Sprinkle over some more chocolate chips if you wish.


Bake for 20-25 minutes (23 is the magic number for my oven). You want them to still be really gooey inside. Once they cool they will firm up.


Leave to cool for a decent amount of time before slicing, or else they just mush everywhere.

Sprinkle with edible glitter if you do feel so inclined.


Enjoy!!!


Nigella's Totally Chocolate Chocolate Chip Cookies

Aka the best chocolate chocolate chip cookies you will EVER make.

The other day I was sitting in my room YouTubing Nigella videos when I came across one for some chocolate chip cookies I had found in one of her books a while back. After scrolling through her website again last night I found the recipe again. My concentration on work was waning. It found me at a time of weakness! I caved and I baked.


Holy mackeral!

My life is complete.

The ultimate cookie recipe is here before you.

As quickly as you bake them they disappear. That is if they even get to being baked.

Far out.

Sorry, just give me a moment to get over this mind blow.


Right. Focus Sophie. Focus on the cookie.  . . nom cookie.


This recipe is supposed to make 12 rather large cookies but I think I managed 16. Probably would have been more had I not eaten so much dough (omg worst food coma of my life).


Here are a few notes on things to do/things I did

  • If you choose not to use the ice cream scoop method, roll the dough into balls and then with a bit of force throw/slap them down onto the baking tray. This will flatten out the bottoms a wee bit.
  • I only used half the chocolate suggested in the recipe (200g v 400g). This is because I am too poor haha and wanted to save the rest of the chips for another day (probably today to make a second batch).
  • Pop 5g of extra butter in with the chocolate so that when you take it off the heat it doesn't solidify but instead remains fluid and scrapable.
  • You want to undercook these. Brown cookies are hard to bake. They are so easy to overcook and then they turn out dry. It is better to under bake them, that way they will definitely turn out fudgy. 
  • As crazy as it sounds, listen to your baking. When you take these out of the oven you still want to hear a bit of sizzling going on. If they cookies aren't singing, they are overdone.
  • The tops should still be a wee bit moist looking.
  • Don't eat your body weight in dough. It hurts.
  • While your food sci class will love you for it, don't give half of these away haha you will regret it when you are back home having just eaten the last one and wanting more.
  • On that note, do give them away. Sophie, stop being so chubs.


Right, shall we do this?

Yes. Yes we should.


Nigella's Totally Chocolate Chocolate Chip Cookies
Adapted from this glorious recipe here
makes 12-16ish

125g butter, softened
5g butter
125g dark chocolate (use at least 70% cocoa solids)
75g soft brown sugar
50g caster sugar
1 cold egg
150g plain flour
30g cocoa
1 teaspoon vanilla
1 teaspoon baking soda
200g (or 400g if you really want) dark chocolate chips

Preheat the oven to 170 degrees on bake.

In a double boiler, or a heatproof bowl over a saucepan with a small amount of simmering water in it, melt the dark chocolate and the 5g of butter. Remove from heat once fully melted together.

Meanwhile, cream together the butter and the sugars. 

Scrape in the melted chocolate and mix until combined. 

Add in the cold egg and vanilla and beat until beautiful and thick.

Sieve in the flour, cocoa and baking soda and mix until just combined (over mixing will make the cookies tough).

Stir in the chocolate chips.

Either use an ice cream or cookie scoop to scoop out mounds onto a baking tray lined with baking paper or roll the dough into balls and slap them onto the tray to flatten the bases out. Don't flatten them with a fork.

If you are making 12 large cookies, bake for 10-12 minutes (see my notes up top about listening to the cookies) but for smaller ones I feel like 8 minutes is the magic number. Again this will depend on your oven. I feel like the oven here at the flat can be a bit cray cray sometimes. 

When they come out of the oven, leave them on the tray for a few minutes, they are really delicate and can break really easily if you move them too soon.

Transfer onto a tea towel or cake rack to cool.

Devour, savour, demolish, destroy . . . share???


Basically, enjoy!!


Just an update since this afternoon when I posted this. After my friend Matt and I drank our cider and ate our wedges (it is a Tuesday tradition) we decided that cookies needed to be made. Which means I make cookies and he tells me hilarious stories about everything. So I decided to do a double batch and make 8 large cookies with the ice cream scoop. This is how they turned out.


So much great.


The rest I made small like the first batch I did. The kids he has to tutor over at Knox tonight are gonna love him!

Nunnite!! xx


Soft and Chewy Pretzels

My first experience of a real, proper bready pretzel was at the Arts Centre in Christchurch many years ago with my best friend Cara.


It was crunchy in some places but soft and warm in the fatter bits. The salt covered exterior satisfied me more than any cheeseburger or bag of mini pretzels ever could. It was like the best salty bread roll I had ever eaten. But way cooler. And tastier.

It changed my life.

I never thought I could make one myself though. I thought that they would be difficult to make.

That was until I stumbled upon a wonderful blog.


I have found that following other foodie type people on Instagram I have been able to stumble across and discover some really cool new blogs. I found this one here,  The Sophisticated Gourmet which is brilliant. Unfortunately he hasn't posted since last year but he has some great recipes like this pretzel one here. I was so excited to find a decent look pretzel recipe from a reliable source. Everything is beautiful to look at. Definitely go and visit it. I can't wait to try out his bagel recipe too.


So this week has been a bit cray cray. I'm not too sure why. Probably a mix of everything. I find one of the best ways for me to calm down is to make bread. It is time consuming. You need to be patient and committed to it. You can't just make it on a whim, it needs to be planned for. I had a mad soft pretzel craving on Wednesday. Unfortunately I don't know of anywhere in Dunedin that sells these beautiful authentic pretzels so what did I do? No I didn't just make myself a piece of toast and tell myself to get over it, I freaking well made an entire batch of them.


Typical Sophie. It was like that time at 11pm I felt like a warm cookie. Most people can't be bothered if it isn't right in front of them. But not me. I will go and make myself an entire batch just so I can have one (or two . . or three . . .). I've also been known to make up corn fritters in the early hours of the morning just because I woke up and was hungry.

I was also curious as to how to make them. Pretzels are one of the few foods (other than fermented shark meat) that has a basic pH (ie above 7).  Now upon reading how to make them I realise it is because they are boiled for about a minute before they are baked in a pot of water and baking soda. Boiling the pretzel in basic solution allows for the interior of the pretzel to puff up making it softer but also chewier. The baking soda allows the exterior to form a nice golden brown crust. Its an odd step compared with usual bread baking but it was actually really cool to see the small pretzels knots puff up in such a quick space of time.

Now I used the dough hook on my stand mixer to knead the dough but kneading by hand (which was originally called for) is totally sufficient and in itself very theraputic.

I have a literature review to write so I am gonna stop waffling on and get to the point!


New York Style Soft Pretzels
Adapted from The Sophisticated Gourmet (who I believe adapted it from Martha Stewart)
Makes 12

2 1/4 teaspoons active dry yeast
2 teaspoon white sugar
1 cup warm water

1 cup (128g) high grade flour
2 cups (256g) plain flour
2 teaspoons salt
35g softened butter

2 tablespoons baking soda
2 teaspoons sugar
7cm worth of boiling water in a medium sized pot (super accurate I know)

Chunky sea or rock salt
1 egg, beaten
1 teaspoon water


In a small bowl, activate the yeast with the warm water and sugar for around 10-15 minutes. It should become very foamy. If nothing happens you need to get new yeast.


In a large bowl, mix together the flours and the salt. Either use your mixer to rub in the butter or do this by hand. You want to achieve a smooth crumb with no visible lumps of butter.


Once the yeast has been properly activated, pour the yeast liquid into a well in the centre of your flours. Use a spoon to bring the dough together.

Either tip the dough onto a lightly floured bench and knead the dough for around 5 minutes or pop it into your cake mixer with the dough hook and leave it to be kneaded for around 5 minutes also. The dough should become smooth and elastic.


Grease up a large bowl with a small amount of oil. Place the dough into this bowl, cover in cling film then leave to rise for an hour in a warm place (like on top of the hot water cylinder). You want the dough to double in size. Apparently you can also leave it in the fridge overnight, which is handy if you want to make these early in the morning.

Cut the dough into 12 portions. Roll out each ball into a rope around 20cm long.


Bring the rope up into a large U shape.


Take the two ends and twist them around each other twice.


Bring the ends back onto the curve of the U and press down lightly to attach them.


Preheat the oven to 250 degrees C (or as high as you can go) on bake.

Bring the water in the pot to a boil. Add the sugar and baking soda.

Using a slotted spatula place three of the pretzels in the boiling water at a time. Leave to boil for 45-60 seconds before removing and leaving to drain on a cooling rack. Repeat with the rest of the pretzels.


Transfer the puffed pretzels onto a baking tray lined with baking paper.

Mix the egg and the teaspoon of water together and brush this over each pretzel.


Sprinkle over a generous amount of salt and any other topping of your choice. Poppy and sesame seeds work well.


Bake for 15 minutes until the outer surface has turned a nice dark golden brown.

Serve warm!

Make sure you eat them within 12 hours of baking them. They aren't as good after that.


Enjoy!!!


Chocolate Bar Brownies

This is day four of that chocolate baking bender I was telling you about.

To be fair, I made these for my flavour science class the next day. We had a 50% exam/test to sit and I thought a spot of brownie would help everyone feel better after the two hours of brain drain.


These were originally called Kit Kat Brownies. As in the Kit Kat brownies from Butter Baking. But I didn't have all the chocolate required (445g) so I decided to use her other recipe for her pretzel brownies as the base as it was mighty fantastic! So I removed all the pretzels and peanut butter truffles and replaced them with oodles of chopped up chocolate bars. It was originally supposed to be only Kit Kats but Cadbury bars were only $0.79 at New World that day, so a couple of moros, moro golds, and some spare caramello may or may not fallen into the mixture. Tragedy I know.


This will be brief, after all I have technically told you all about this one before, it just has a few different inclusions that's all.


Chocolate Bar Brownies
makes 20x30cm sized tray

225g butter
1 3/4 cups soft brown star
1 cup and 2 tablespoons cocoa
100g good quality dark chocolate (60-70% cocoa solids will do)
1 teaspoon vanilla
2 eggs
1 egg yolk
3/4 cup plain flour
1/2 cup dark/white chocolate chips
2 Kit Kat chunky bars
3 more chocolate bars of your choice (I definitely recommend moro gold bars. Bounty would be good. So would twix. om nom nom! Actually you can flag the kit kats and put whatever you like in!)

Preheat the oven to 170C. Line a 20x30cm baking tray with baking paper.

In a double boiler (ie a heatproof bowl over a saucepan of simmering water) melt the butter. Add in the chocolate and stir until smooth. Dissolve in the brown sugar and cocoa. Stir until evenly combined. Transfer this mixture into a large bowl and beat for a minute until smooth.


Add the eggs and yolk one at a time, beating well between each addition until the mixture is thick and smooth.


Add in the flour and stir as many times as you need until the flour "whiteness" disappears.
Stir in the chocolate chips and the chocolate bars (that have all been chopped up into relatively chunky pieces).


Press the mixture into the tray and bake for 20-25 minutes. Remember it is better to undercook than over cook so definitely give it a check at 20 minutes as each oven is different.


Enjoy!!


Chocolate Lamington Cupcakes

I have been baking non stop. I think today is the only day I haven't made anything in the last like ten days. That's pretty bad. In those last ten days I have made another brownie, hot cross buns, countless cookies including the white chocolate, maple syrup spice cookies that I have yet to perfect and a double layered vanilla bean cake. I think it is just turning into a habit. I really need to stop.


I think the problem is that it is actually quite lonely in our little three person flat. The others are always doing something away in their rooms. I like being alone but I prefer friendly company more. Sometimes you don't even have to interact with the person. You can just sit there doing separate things but still feel like you are being part of something and spending time with that person. Take my best friend Cara for example. We can sit in the same room for hours not talking (although lets be honest, going without talking to her never lasts long!) but we still feel like we are spending quality time together. I think thats why my friends sometimes just find me sitting on the end of their bed, or on their couch just chilling, just absorbing the friendly, loving vibes that are around.

How did I get onto this? ah right, I am substituting in-flat human contact with baking. After all baking equals love. Hmm gift giving (especially of the edible kind) and kind acts of service (get your minds out of the gutter people!) are my expressive love languages.


So now it seems I have a whole stack of recipes I need to blog about. Looks like a job for this coming weekend! But for now I will share with you some delicious cupcakes.

Lamingtons are having a bit of a comeback in the trendy department. You find some very cute looking ones hiding away in some nifty cafes. There is nothing better than a fresh lamington filled with whipped cream and a dollop of really good berry jam. Nom! They are quite a retro wee cake, reminiscent of tea rooms and bakeries stopped at during long family car trips in small New Zealand towns. They are on the same sort of nostalgic level as the mighty custard square.

In the Treats from Little and Friday book I have they have these amazing looking lamingtons. The only thing is that thy aren't your typical lamingtons. They are in fact a cone of really moist, dense chocolate cake smothered in ganache and thickly desiccated coconut. They looked amazing. I really wanted to make them. The only problem was that I didn't have the cone shaped moulds that they baked them in.


So instead of making cone shaped lamingtons I made cupcake sized ones. But I didn't make a dense heavy cake, I made a light and airy chocolate cupcake sponge instead which I then smothered in chocolate ganache. They were divine. They looked really effective too. They certainly didn't last long, especially after giving some to the neighbours as well as Maria, Jamal and Jolene on my way to the gym. Its a good thing most of them were given away, like I said, there are only three of us here.


So the cupcake recipe I used came from The Hummingbird Bakery Cookbook by Tarek Malouf but I made a wee change. Instead of using 140g of caster sugar I used instead muscovado sugar. This is a less refined sugar as it still has molasses in it. This doesn't make it any better for you though! It has a greater moisture content and the granules are slightly bigger. It lends a wonderful colour and more intense flavour than regular caster or even regular brown sugar. This is perfect for making chocolate cakes with. It make the cakes slightly more velvety that they usually would be. It's hard to describe but I feel like velvety is a good world.


Now for those of you who have never made a ganache before (dear lord you have been missing out!) it is really easy but you are gonna want to do it a few hours before you want to use it as it needs to set in the fridge.

In a double boiler (ie a heatproof bowl over a simmering pan of water) you want to heat your cream. Once the cream is hot enough so you cant put your finger in it for longer than five seconds you can pop in your chocolate. Now I like using the Nestle dark chocolate melts for this. I just like the intense flavour but the sweetness too. For these cupcakes I used just a block of Cadbury 70% cocoa solids chocolate but substituted in about a quarter of it with just plain dairy milk to make it sweeter. It's all up to personal preference. Stir in the chocolate until it is all melted and smooth. Take the bowl of the water (carefully!) and leave to sit on the bench until it is cool enough to pop in the fridge. Don't cover it while it is still hot because then you get condensation dripping back into it. Then once it is almost fully set (still spreadable but firm), use a hot knife or palate knife to artfully swirl the ganache onto the cupcake. Then sprinkle over the coconut and you are ready to go.


I used rather large cupcake cases for these. The Jaytee ones (in the supermarket) I find are quite small. I wanted a decent sized cupcake for this. Just whatever you do, only fill it to 2/3 of the way up otherwise you end up with a very messy spill over! Not ideal!


Chocolate Lamington Cupcakes
Adapted from The Hummingbird Bakery Cookbook
Makes 16

200g plain flour
40g cocoa powder
280g muscovado sugar (brown sugar will also suffice)
3 teaspoons baking powder
80g butter, softened
240ml (1 cup) milk (preferably whole but it doesn't really matter)
2 large eggs
1 teaspoon vanilla essence

about a cup of large flaked desiccated coconut

for the ganache:
400g good dark chocolate (If using really high cocoa solids try try substituting in a proportion of milk chocolate to make it sweeter if you wish)
1 cup full fat cream


To make the ganache, heat the cream in a heatproof bowl over some simmering water. Place the chocolate into the bowl, leave to sit for a minute then stir until melted and smooth. You may want to take the bowl off the heat if you are worried about the chocolate burning on the bottom. Leave to cool on the bench before transferring to the fridge for a few hours.


Preheat the oven to 170 degrees.

In a large bowl mix together the flour, sugar, cocoa and baking powder until a fine sandy consistency is achieved.

In a separate bowl, beat the eggs, milk and vanilla together. Slowly add, in thirds this mixture to the dry mixture. Beat well after each addition. Once all the liquid has been added, beat on high for a minute so that the mixture becomes thick and smooth.

Spoon the mixture into a muffin tray lined with large paper cases until they are two thirds full (!!!).

Bake for 20 or so minutes or until the sponge bounces back when touched, a skewer comes out clean, your house smells like baked cupcake or you can hear them no longer sizzling away.

Transfer to a wire rack to cool.

Leave to cool completely before smothering in ganache and sprinkling with coconut.


Enjoy!!


Peanut Butter Truffle, Triple Chocolate, Pretzel Brownie

Some people cover their feelings with food. Some people try and drown out their sorrows by drinking.

I bake out my stresses and woes. 

Im currently on day three of my chocolate baking bender.


So in the last week I am pretty sure I have been to New World like every day to buy more ingredients. 


The peak of this tragic behaviour was when I went to New World twice within twelve hours and purchased six blocks of chocolate, a kilo of butter, more chocolate chips, a nice big jar of peanut butter and a bottle of cream.

You know magic is about to happen when those items fill up your basket. 


Four days ago I somehow ended up following Butter Baking on instagram. I seriously do not know how. Anyway she posted these delicious looking cookies so I went to go check out her blog.

Oh. My. God. 

I died and went to blogging heaven. 

So. Much. Great.

Almost everything contains chocolate or nutella or peanut butter or a combination of all three! So I jumped up off my seat in the commerce building (where I was just chilling at the time even though I don't do anything commercy at all) and went with my dear friend Matt to New World. So this is how all that chocolate and cream came to be in my shopping basket. 

www.butterbaking.com

Go there. Like now!

So anyway I recreated her pretzel, chocolate chip, peanut butter brownies. 


Sorry about the weird lighting in the photos. I was too preoccupied with the wonders before me to really care haha. Until now.

Anyway, pretty sure all the crack dealers are about to go out of business.

Ok I know the idea of pretzels sounds strange especially in a chocolate brownie but how many of you love putting jam and peanut butter together? or maple syrup on your bacon? The combination of salty and sweet, creamy and crunchy, moist and fudgy, it is just amazing. Trust me. 


I did make a few adjustments to her recipe, mainly out of lack of the appropriately coloured chocolate chips! But also I decided to use brown sugar instead of white. I had enough of the white. I think it is because I wanted a really dark colour. I dunno. I always feel cookies are better with brown sugar so why not brownies. Brown sugar contains molasses which gives whatever you use it in a more intense colour and flavour. Yum. I actually just used muscovado sugar in my chocolate cupcakes today. They turned out so great! the flavour was really intensified!


So yes. Make this brownie. It will change your life. 


Tripe Chocolate, Peanut Butter Truffle and Pretzel Brownie
adapted from the recipe by Butter Baking
Makes a 20x30cm brownie


For the peanut butter truffles:

1/2 cup crunchy peanut butter (I used extra crunchy!)
30g butter
2 tablespoons brown sugar
1/2 cup icing sugar


For the most amazing brownies of your life:

225g butter
1 3/4 cups soft brown sugar
1 cup and 2 tablespoons cocoa
100g good quality dark chocolate (60-70% cocoa solids is enough)
1 teaspoon vanilla
2 eggs
1 egg yolk
3/4 cup plain flour
1/2 cup dark chocolate chips or melts
1/2 cup white chocolate melts
1 cup pretzels plus a few extra to dot over the top
All of the peanut butter truffle balls made above
1 teaspoon sea salt flakes


To make the truffles, melt the butter and peanut butter in a small saucepan. Once they have melted together, add in the brown sugar. Stir until it dissovles. Then gradually add in the icing sugar and stir until it is all nicely combined. Remove from the heat. Take half teaspoon amounts and roll into balls. Place in a plastic container and pop that in the freezer while you go and make your brownie.


To make the brownie, preheat your oven to 170 degrees C and line your baking tray with baking paper.  

In a double boiler (ie a heat proof bowl balanced over a saucepan with a few centimetres of simmering water beneath it) melt together the chocolate and butter, being careful not to burn the chocolate. I find melting the butter a bit first before adding the chocolate helps. Then add the brown sugar, cocoa and vanilla and stir until it is all combined.

Transfer this mixture into a larger mixing bowl or the bowl of your stand cake mixer. Beat the mixture just to make sure it is nice and smooth. 

Add your eggs one at a time, beating well in between each addition. The mixture should now be nice and thick and glossy.

Add the flour and stir only as many times as it takes for any visible flour to disappear. 

Mix in the pretzels, chocolate melts and peanut butter truffle balls.

Press the mixture into the lined baking tin. Dot a few whole pretzels over the top and sprinkle over the sea salt flakes.

Bake for 20-25 minutes (I baked mine for 24 and I think it could have done with only 23). You do still want a skewer to come out slightly gooey. 

Leave to cool before slicing or else it will just goo out everywhere. Which I guess isn't a bad thing.

This is why you are going to want to beat it properly

To easily separate eggs, break them into your hands and
use your fingers to sieve out the white.

This is how lovely and glossy it should look after all the
eggs

Post flour addition

Could this get any better?

The answer is yes. yes it can.

Try cutting the corners of your paper to get a more fitted
lining


Go for a run in preparation for eating the whole lot because there is no way you can run after eating these things!

The neighbours the other day helped me break into my flat. Lucy was away in Christchurch and Alex just left me on the doorstep with all our shopping (we both forgot our keys). Thank God for neighbours!


So I sent them a thank you :)

Enjoy!

xx

Blueberry and Frangipane Tart


What a terrible blogger I've been. It has almost been a month since I last wrote here even though it seems like I have been baking every day! I feel like such a bad person. I kinda wish I hadn't been baking within that last month (I dread the day I have to put my skinny jeans back on).


Wow so much has happened since I last posted here. I had an early 21st Mexican fiesta birthday party back home! Which was awesome. The photos are on my instagram feed :). What else, oh I moved back to Dunedin back into my wee little flat. Lucy and I got a new flatmate; Alex, to replace Alix who moved up to Auckland. Just to clarify, this Alex is male. You never know with the name Alex.  Oh and I turned 21! Yay me for surviving childhood illness in this hardship that is the 1st world. Slash yay me for not screwing up so far. My parents can proudly call me a success and no longer have to take the bad parenting blame for anything dumb I do now. But most exciting were the arrival of my two new babies.


For a whole week before my birthday there were these two HUGE gift wrapped and bowed boxes
sitting in the corner of our tiny lounge.


 Then on my birthday two glorious machines emerged! My 21st presents from my family and family friends were a beautiful Kitchenaid stand mixer and its (almost) matching Kitchenaid food processor. Holy mackerel! They are beautiful. Wonderful. To die for. Amazing! They are brilliant. I have named my cake mixer Nigella (because she is a goddess) and my processor Annabel (it was going to be a Jamie but I have trust issues with Jamie recipes at the moment).

Annabel

Nigella

Seriously, who needs a man when you have two perfectly smooth, stunning, robust, high quality kitchen appliances in your life? They do the job and they do it well. They don't complain and they are forever reliable. So. Much. Great.

Anyway since receiving these beautiful machines I have been baking and processing almost everyday. I think my flatmates need to stage an intervention on the baking front. Pretty sure I will be obese in no time.


Do you remember that Little and Friday cookbook I got for Christmas? I made the wee banana cakes from it about two months back. Ever since I got it I have been wanting to make one of the beautiful tarts they have pictured. The only problem is that you had to make pastry, then the frangipane then the creme patisserie and so on and so forth. The recipes were tricky and bitsy.


But! Now that I have my beautiful toys making these tarts (and finally using the tart dishes I bought) was be a dream.

I managed to find some cheap blueberries ($2.49 a punnet!) at Vege Boys and I wanted to use them in something special. Blueberries are still a treat food for me and I feel like their glory is wasted when they are just thrown into a smoothie or sprinkled over yoghurt.


Now what better way to celebrate the wonder that is the humble blueberry that by placing it on a pedestal of vanilla bean and lemon pastry, a layer of delicious frangipane as well as cushioning each and every berry with the soft caress of creme patisserie. Ok I got a little carried away there.  . .

I adapted this recipe from the Little and Friday book (Treats From Little and Friday). I started off thinking I was going to make six small tarts. I was going to line all six of my small tart tins then freeze four of them and only bake the other two. Since Lucy is away this weekend it seemed silly to have an abundance of tart in the house.

I made this pastry up yesterday in my food processor and left it wrapped up in the fridge overnight. When I went to go roll it out (after softening it in the microwave for 20 seconds) I realised that I had far too much pastry and that the recipe I used was whack as crack when it said it would do for 6 small tart cases. I ended up lining my long rectangular tart tin as well as 10 small muffin holes for when I need to make mini pecan pies next. Its not a problem at all, its actually a good thing. It saves time in the future. It makes access to tarts far more . . well accessible.

So I am saving the small individual tarts for another day and instead using my long rectangular one. Winning!


This was definitely a learning process for me so along the way i'll point out mistakes to avoid and things to remember! :)

Also, you can buy food processors from Kmart for $59. I'm not sure what they would be like but I bet they would do the job for pastry.

Blueberry and Frangipane Tart
Makes one long rectangular sized tart
Loosely adapted from Treats from Little and Friday by Kim Evans

You will need 2 punnets of whatever berry fruit you desire. I would avoid strawberries though, they have too high a water content and would turn to mush on top of the tarts. I recommend raspberries and blueberries.

For the vanilla bean and lemon pastry (of which there will be plenty left over to line around eight or nine small tart cases):
2 3/4 cups plain flour
1 cup icing sugar
250g butter
1 large egg
3 teaspoons of lemon juice (about the juice of half a lemon)
zest of one lemon
1 teaspoon vanilla essence or 1/2 teaspoon vanilla bean paste

In a food processor (buy, borrow or steal yourself one), pulse together the flour, icing sugar and lemon zest. This is to mix it together and to aerate it. Add the butter in cubes and pulse until the mixture looks like fine golden sand. Add the egg, juice and vanilla and pulse until the mixture comes together. It will look dry and crumbly but trust me, it does come together. Turn the dough onto a floured bench and bring it together into a smooth ball. Flatten the ball into a disc then wrap in glad wrap and refrigerate for at least two hours. Apparently this pastry can be kept in the fridge for up to two weeks. Or if you aren't going to use it all at once, do what I did and line spare tart tins. Wrap them in glad wrap then pop them in the freezer. When you go to use them you don't need to thaw them, just fill them and bake!

To line your tins, roll the pastry out onto a floured bench until it is about 3mm thick. Try spraying the top of the pastry lightly with cooking spray to stop the pastry sticking to the rolling pin. If you are making the rectangle shaped tart roll the pastry out until it is about 4 cm larger on each side than the tart tin. Drape the pastry over the tin and gently press the pastry into the corners of the tin with your fingers. Use large cooks knife to trim the edges. Prick the base with a fork and then return to the freezer while you preheat the oven (about 30 minutes).


 Ok the following couple of photos are when I was filling the small round tarts. The same process still applies for the long rectangular one or even a large circular one.


Press the pastry into the tin gently with your fingers


You don't have to wrap it in gladwrap if you are going to
use it that day. At the time of wrapping I still thought I
was going to make the small ones.

Dock your pastry with a fork 


For the frangipane (enough for just the rectangular tart or six small tarts i.e. about a cup and a half):

62g butter, softened
1/4 cup + 2 tablespoons caster sugar
1 large egg
3/4 cup ground almonds
1 1/2 teaspoons plain flour

Cream together the butter and sugar. When light and fluffy, add in the egg and beat until voluminous and airy. Add the almonds and flour and stir until combined.


For the creme patisserie (enough for just the rectangular tart or six small tarts i.e. about a cup and a half):

250 ml (1 cup) milk (trim or full fat it doesn't matter)
1/4 cup caster sugar
4 teaspoons plain flour
1/2 teaspoon vanilla bean paste
2 egg yolks (from small eggs)

Beat together the sugar, egg yolks and vanilla until thick and pale. Add the flour and beat until thick. In a medium sized saucepan (don't use a small one like I did!), bring the milk to a simmer whilst stirring so it doesn't burn on the bottom. Whilst beating the egg mixture start carefully pouring the hot milk into the mixing bowl making sure the addition is gradual. Beat until all the milk has been added and there are no lumpy bits at the bottom of the bowl. Return this mixture to the saucepan. Heat the custard whilst quickly whisking until just before boiling point (Ie a trembling simmer). If you heat the custard mixture to beyond boiling point it totally collapses and the egg curdles and it becomes a total unusable disaster. Don't do this. Thankfully we had enough milk in the fridge for me to start again. Take it off the heat immediately and pour into a clean bowl. Leave to cool before using. you should see it become nice and thick as soon as you take it off the heat. Check out this video to see if you are doing it right.

Heat the milk (in a much larger saucepan than this!)

In a bowl, beat your eggs, sugar, vanilla and flour until
thick and pale. Then gradually pour in the hot milk.
Beat this until everything is mixed in then return to the
saucepan.

Whisk until just until it starts boiling. No later!

It should start thickening as soon as you take it off the heat.
Don't be tempted whatsoever to keep it cooking.

If you leave it to boil too long it will end up looking like
this. 

If in doubt, google!!


To assemble the tarts:

Preheat the oven to 180 degrees on bake. Place a baking tray in the oven to also preheat. You will put the tart on this and it will enable a crispier base.

Spread the frangipane over the base of the tart. Then spread the creme patisserie over the top of that. Top the tart with the berries. Bake for 30 minutes or until pastry is golden.

Leave the tart to cool before removing from the tin.

To serve, dust with icing sugar and some long strips of lemon zest.


On goes the frangipane

Then the creme patissiere 

Then the fruit :)


Place it on the preheated baking tray

and voila!

So. Much. Great. 


Prepare for your friends to weep when you serve them up
a slice.


Enjoy!


xx